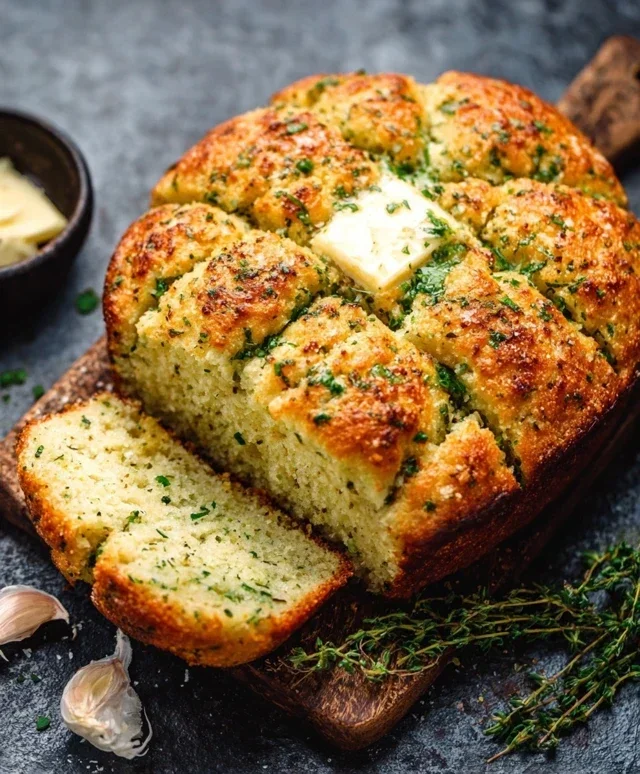
Easy Homemade Bread Recipe – Deliciously Simple
Homemade bread is more than just a recipe; it’s an experience, a delicious journey that transforms simple ingredients into something truly magical. Have you ever walked into a bakery and been captivated by that irresistible aroma of freshly baked loaves? That’s the allure of homemade bread, a scent that instantly evokes warmth, comfort, and a sense of accomplishment. There’s a profound satisfaction in taking flour, water, yeast, and salt, and with a little patience and love, creating a beautiful, crusty masterpiece. People are drawn to homemade bread not just for its incredible taste and texture – that perfect chew, that satisfying crunch – but also for the simple, grounding pleasure of the process. It’s a chance to disconnect from the everyday hustle and reconnect with a timeless craft, a skill passed down through generations. This isn’t just about sustenance; it’s about creating something tangible, something that nourishes both body and soul. So, let’s embark on this delightful adventure and bake some truly unforgettable homemade bread together.
Why You’ll Love This Recipe
The unparalleled aroma filling your kitchen
The deeply satisfying texture and flavor
The pride of creating it yourself
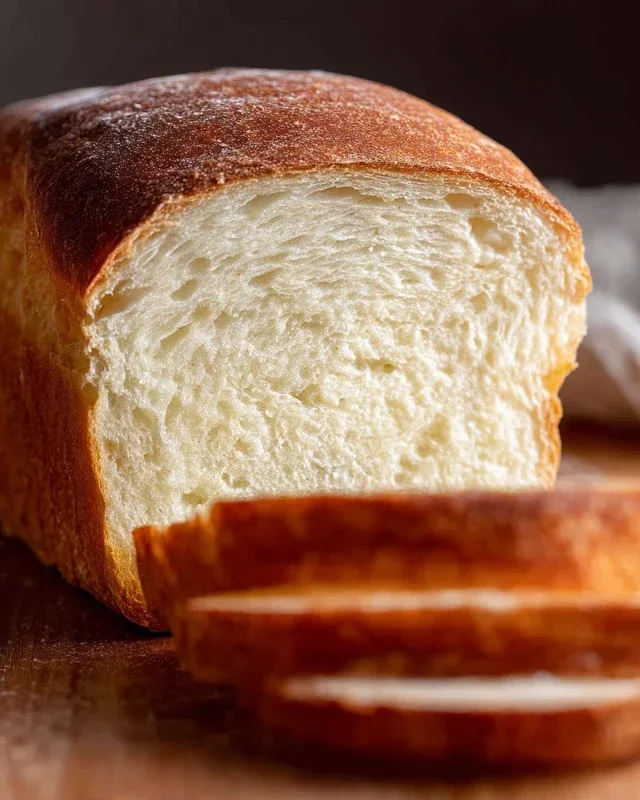
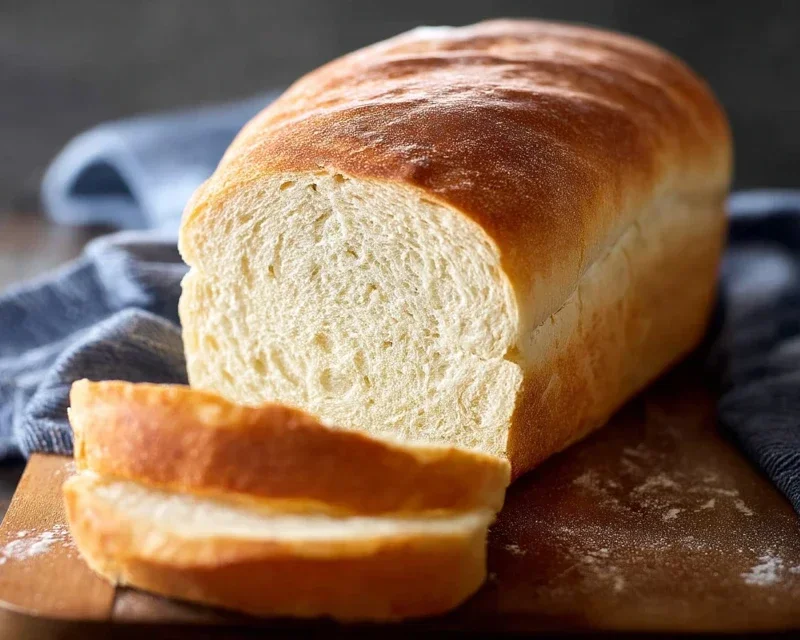
Homemade Bread
There’s something incredibly satisfying about pulling a warm, crusty loaf of homemade bread from your oven. The aroma alone is enough to make your kitchen feel like the heart of the home. Forget those store-bought loaves that often lack character and flavor; baking your own bread is a rewarding journey that yields delicious results. It’s a process that connects you to generations of bakers and offers a tangible sense of accomplishment. With just a few basic ingredients and a little patience, you can create a staple that elevates every meal.
Ingredients:
Baking your own bread from scratch might seem intimidating at first, but it’s a remarkably forgiving process. The key is to be gentle with your dough and trust the science of yeast. Yeast is a living organism, and its activity is crucial for the rise and texture of your bread. Using the right temperature water is essential to awaken the yeast without killing it. Aim for that sweet spot between lukewarm and comfortably warm to the touch. Honey or sugar isn’t just for sweetness; it also provides food for the yeast, helping them to multiply and produce those airy pockets that make bread so delightful. Salt, beyond adding flavor, controls the yeast’s activity, preventing it from over-proofing and ensuring a consistent bake. The oil contributes to the tenderness and moisture of the finished loaf, making it a pleasure to slice and enjoy. The amount of flour can vary depending on the humidity in your kitchen and the specific type of flour you use, so it’s always best to start with the lower end of the range and add more as needed.
Getting Started: The Magic of Proofing
1. In a large mixing bowl, combine the warm water and the active dry yeast. If you’re using honey, stir it in now. Let this mixture sit undisturbed for about 5-10 minutes. You’ll know the yeast is alive and active when it becomes foamy and bubbly on the surface. This is called “blooming” and it’s a crucial step to ensure your bread will rise properly. If you don’t see any foam, your yeast might be old or the water wasn’t the right temperature, and you’ll want to start over with fresh yeast. If you’re using sugar, you can add it with the yeast and water, though honey tends to produce a slightly richer flavor and a softer crust.
2. Once your yeast has bloomed, add the salt and oil to the mixture. Stir gently to combine everything. Now it’s time to start adding the flour. Begin extract by adding 4 cups of flour to the wet ingredients. Use a sturdy spoon or a dough whisk to mix everything together until a shaggy dough begin extracts to form. At this stage, the dough will be sticky and quite wet. This is perfectly normal. Avoid the temptation to add too much flour too early, as this can result in a dry, dense loaf.
Kneading Your Way to a Perfect Loaf
3. Turn the shaggy dough out onto a lightly floured surface. Now comes the satisfying part: kneading. If you have a stand mixer with a dough hook, you can use that on a low speed for about 8-10 minutes. If you’re kneading by hand, push, pull, and fold the dough repeatedly. As you knead, the dough will become smoother and more elastic. Add more flour, a tablespoon at a time, only if the dough is excessively sticky and unmanageable. You’re looking for a dough that is smooth, elastic, and springs back when you gently poke it with your finger. This process develops the gluten in the flour, which gives bread its structure and chew. Don’t over-flour; a slightly tacky dough is better than a dry one.
The Patient Rise: Allowing Time for Flavor
4. Lightly grease a clean large bowl with a little oil. Place the kneaded dough in the bowl, turning it once to coat all sides with oil. Cover the bowl tightly with plastic wrap or a clean, damp kitchen towel. Place the bowl in a warm, draft-free place to rise. This could be a slightly warmed oven (turned off, of course!), on top of a refrigerator, or near a sunny window. Let the dough rise for 1 to 1.5 hours, or until it has doubled in size. This is the first rise, or “proofing,” where the yeast does its magical work of creating air pockets and developing flavor. The duration can vary depending on the temperature of your environment.
Shaping and Baking: The Final Flourish
5. Once the dough has doubled, gently punch it down to release the air. Turn the dough out onto a lightly floured surface and shape it into your desired loaf form. For a classic sandwich loaf, shape it into a rectangle and then roll it up tightly, pinching the seam to seal it. Place the shaped dough into a greased loaf pan. Cover it loosely with plastic wrap or a towel and let it rise again for another 30-45 minutes, or until it has almost doubled in size. Preheat your oven to 375 degrees Fahrenheit (190 degrees Celsius) during this second rise. Once the dough has risen sufficiently, bake the loaf in the preheated oven for 30-40 minutes, or until the crust is a deep golden brown and the internal temperature reaches 190-200 degrees Fahrenheit (88-93 degrees Celsius) when tested with an instant-read thermometer. If the top is browning too quickly, you can loosely tent it with aluminum foil.
Once baked, remove the bread from the pan immediately and let it cool completely on a wire rack before slicing. The cooling process is just as important as the baking; it allows the internal structure to set and the flavors to meld. Enjoy your beautifully crafted homemade bread!
Conclusion:
You’ve now got the tools and confidence to embark on your own homemade bread baking adventure! This recipe is fantastic because it demystifies the process, proving that you don’t need fancy equipment or years of experience to create a truly delicious, crusty loaf. Imagin extracte the aroma filling your kitchen as it bakes, and the satisfaction of slicing into your own warm, perfectly textured bread. It’s a rewarding experience that elevates any meal.
Serve this wonderful loaf alongside hearty soups, stews, or pasta dishes. It’s also divine with a smear of butter, your favorite jam, or as the base for decadent toast. Don’t be afraid to get creative! Consider adding herbs, seeds, or even a touch of sweetness like honey or molasses to the dough for delicious variations. The possibilities are endless, and the joy of sharing your creation is unparalleled. So, roll up your sleeves, embrace the kneading, and discover the magic of baking your own bread!
Frequently Asked Questions:
Why did my bread not rise?
A few common culprits can prevent your bread from rising. Ensure your yeast was fresh and properly activated (it should foam). Make sure your proving environment was warm enough – a slightly warm oven (turned off) or a sunny spot can help. Over-kneading or under-kneading can also impact the rise.
How can I get a crispier crust?
To achieve a wonderfully crisp crust, consider adding steam to your oven during the initial baking phase. You can do this by placing a pan of hot water on the bottom rack as you preheat your oven, or by spraying the oven walls with water a couple of times in the first 10-15 minutes of baking. Baking on a preheated baking stone or steel can also enhance crust crispiness.
Homemade Bread
A simple and delicious recipe for homemade white bread, perfect for sandwiches or toasting.
Ingredients
-
2 cups warm water (105-115 degrees)
-
1 Tablespoons active dry yeast
-
1/4 cup honey
-
2 teaspoons salt
-
2 Tablespoons canola oil
-
4 – 5 1/2 cups all-purpose flour
Instructions
-
Step 1
In a large bowl, dissolve the yeast in the warm water. Let it sit for 5-10 minutes until foamy. -
Step 2
Stir in the honey, salt, and oil. -
Step 3
Gradually add the flour, 1 cup at a time, mixing until a shaggy dough forms. Turn out onto a floured surface and knead for 8-10 minutes until smooth and elastic. -
Step 4
Place the dough in a greased bowl, cover with plastic wrap, and let it rise in a warm place for 1 hour, or until doubled in size. -
Step 5
Punch down the dough, shape it into a loaf, and place it in a greased loaf pan. -
Step 6
Cover the loaf pan and let it rise for another 30 minutes. -
Step 7
Bake in a preheated oven at 375°F (190°C) for 30-35 minutes, or until golden brown and sounds hollow when tapped. -
Step 8
Let cool on a wire rack before slicing.
Important Information
Nutrition Facts (Per Serving)
It is important to consider this information as approximate and not to use it as definitive health advice.
Allergy Information
Please check ingredients for potential allergens and consult a health professional if in doubt.