Flourless Chickpea Brownies – Vegan Gluten Free Treat
Flourless Chickpea Brownies are about to revolutionize your dessert game, and trust me, you won’t believe what’s hiding inside! Forget everything you thought you knew about brownies. These incredibly fudgy, intensely chocolatey delights are surprisingly made with chickpeas, yes, actual chickpeas! Don’t let that ingredient throw you off; they disappear completely, leaving behind nothing but pure brownie bliss. This recipe is a dream come true for anyone following a vegan or gluten-free lifestyle, but even if you’re not, these Flourless Chickpea Brownies will win you over with their rich flavor and melt-in-your-mouth texture. What makes them truly special is their ability to satisfy that deep chocolate craving without any of the typical allergens. Prepare to be amazed by how simple, wholesome ingredients can transform into something so decadently delicious.
Ready to ditch the flour and embrace the bean?
Flourless Chickpea Brownies (Vegan & Gluten Free)
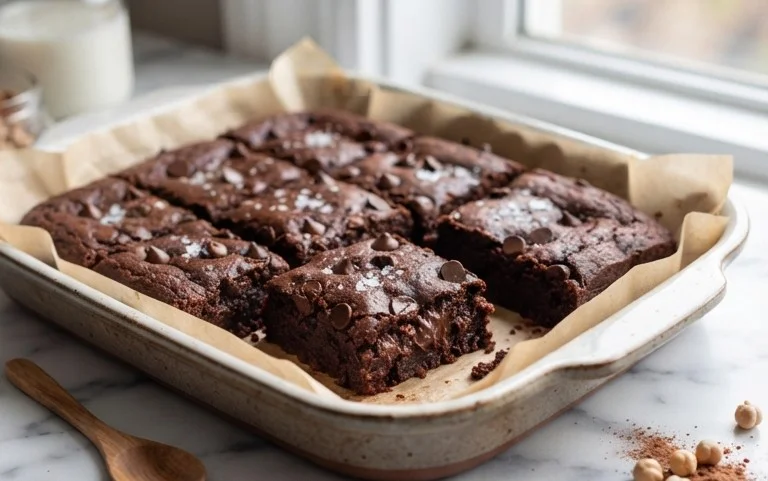
Get ready to indulge in a brownie that’s surprisingly good for you! These flourless chickpea brownies are a game-changer for anyone seeking a decadent chocolate treat without the gluten or dairy. They’re fudgy, rich, and packed with plant-based goodness. The secret? The humble chickpea! Don’t worry, you won’t taste them. Instead, they provide an incredible moistness and a protein boost that makes these brownies feel almost guilt-free. They’re so easy to whip up, making them perfect for a last-minute dessert craving or a healthy snack for the whole family. Plus, they’re naturally vegan and gluten-free, catering to a variety of dietary needs without sacrificing flavor.
Ingredients:
Cooking Instructions:
Preparing these flourless chickpea brownies is incredibly straightforward, requiring just a food processor or a powerful blender and a few simple steps. The whole process, from gathering ingredients to popping them in the oven, should take you no more than 15 minutes.
Step 1: Prepare the Chickpeas and Wet Ingredients
First things first, grab your can of chickpeas. It’s crucial to rinse them thoroughly under cold water. You want to get rid of as much of that canning liquid as possible, as this can sometimes impart a subtle flavor or texture that isn’t ideal for brownies. After rinsing, drain them really well. I like to give them a good shake in the colander. Next, transfer the drained chickpeas to your food processor. Add in the almond butter (or your chosen alternative). If your almond butter is very stiff, you might want to give it a good stir in the jar before measuring. Then, pour in the pure maple syrup and the vanilla extract. These are the core of our “wet” ingredients, working together with the chickpeas to create a smooth, moist batter.
Step 2: Blend Until Smooth
Now, it’s time to bring everything together. Secure the lid on your food processor and begin extract to blend. You’ll want to process this mixture until it’s as smooth as possible. This might take a few minutes, and you might need to stop and scrape down the sides of the food processor bowl a couple of times. Patience is key here! The goal is to have a completely uniform, creamy batter with no visible chickpea lumps. This smooth base is what will give your brownies that luscious, fudgy texture. If you find your mixture is too thick to blend smoothly, you can add a tablespoon of water or almond milk at a time, but do so sparingly, as you don’t want to make the batter too wet.
Step 3: Incorporate Dry Ingredients and Chocolate Chips
Once you have a beautifully smooth chickpea mixture, it’s time to add the dry ingredients that will transform it into brownie batter. Add the unsweetened cocoa powder, baking powder, baking soda, and sea salt directly into the food processor bowl with the wet ingredients. Pulse a few times to combine them loosely before turning the processor back on to blend until everything is fully incorporated and the batter is a rich chocolatey brown. Don’t overmix at this stage; just blend until you no longer see streaks of any of the dry ingredients. Finally, add in the ¾ cup of mini chocolate chips. Pulse just a few times – you want to break them up slightly and distribute them throughout the batter, but not so much that they completely disappear. You want those delightful pockets of melted chocolate in your finished brownies!
Step 4: Bake the Brownies
Preheat your oven to 350°F (175°C). Lightly grease an 8×8 inch baking pan or line it with parchment paper, leaving some overhang on the sides to easily lift the brownies out later. Spoon the batter into the prepared baking pan and spread it out evenly using a spatula. If you like an extra chocolatey finish, you can sprinkle a few more mini chocolate chips over the top of the batter before baking. Place the pan in the preheated oven and bake for 25-30 minutes. The brownies are done when a toothpick inserted into the center comes out with moist crum extractbs attached, but not wet batter. Be careful not to overbake, as this can lead to a dry brownie, and we’re aiming for fudgy!
Step 5: Cool and Enjoy
This is arguably the hardest part – waiting for them to cool! Once they’re out of the oven, let the brownies cool in the pan on a wire rack for at least 20-30 minutes. This allows them to set up properly and makes them much easier to cut. For the fudgiest texture, I highly recommend letting them cool completely, or even chilling them in the refrigerator for an hour or two before cutting into squares. This step is crucial for achieving that dense, chewy, brownie-like consistency. Once cooled, use the parchment paper overhang to lift the entire slab out of the pan. Slice into squares and enjoy your delicious, guilt-free, flourless chickpea brownies! They store beautifully in an airtight container at room temperature for a few days, or in the refrigerator for up to a week.
Conclusion:
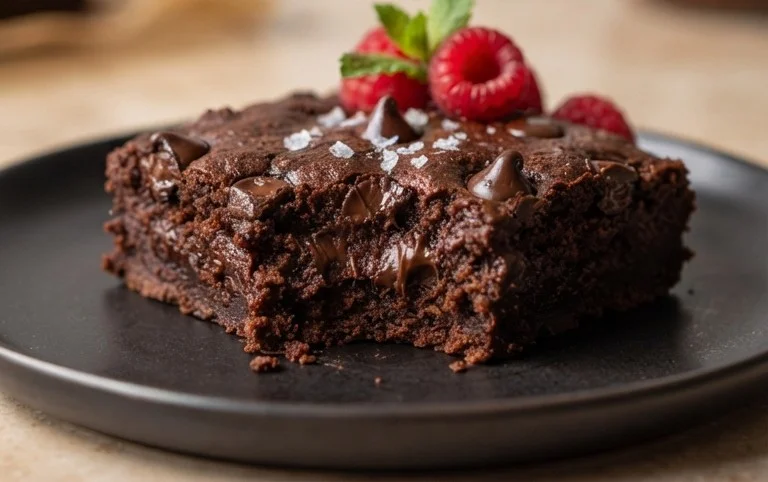
And there you have it – a truly decadent yet surprisingly wholesome treat! These flourless chickpea brownies are a game-changer for anyone seeking a delicious dessert that caters to multiple dietary needs. The humble chickpea works its magic, creating a fudgy, rich texture without a speck of gluten or any animal products. I love how versatile they are, satisfying that intense chocolate craving while feeling good about what I’m eating. They’re perfect for baking when you need a quick, impressive dessert, or just for a weeknight indulgence.
For serving, I find these flourless chickpea brownies absolutely divine warm, perhaps with a scoop of your favorite vegan ice cream or a dusting of powdered sugar. They also hold up wonderfully at room temperature, making them ideal for potlucks or to pack for a sweet snack on the go. Feel free to experiment with variations too! Add some vegan chocolate chips for extra gooeyness, chopped nuts for a satisfying crunch, or even a hint of espresso powder to deepen the chocolate flavor. Don’t be shy – give these amazing vegan and gluten-free brownies a try! You might be surprised at just how incredible they are.
Frequently Asked Questions:
Can I use a different type of bean?
While chickpeas are the star of this recipe and provide a neutral flavor and ideal texture, you could experiment with other white beans like cannellini beans. Ensure they are well-rinsed and processed thoroughly to avoid any noticeable bean taste.
How should I store these brownies?
Once cooled, store your flourless chickpea brownies in an airtight container at room temperature for up to 3 days, or in the refrigerator for up to a week. They also freeze beautifully if you want to make a larger batch and have them on hand for future cravings.
Will I taste the chickpeas?
Rest assured, the strong flavor of chocolate and the other ingredients completely masks any hint of chickpea. The chickpeas contribute a fantastic texture and binding property without imparting their own taste.
Flourless Chickpea Brownies (Vegan & Gluten Free)
Deliciously fudgy vegan and gluten-free brownies made with chickpeas and wholesome ingredients.
Ingredients
-
15.5 ounces chickpeas (1 can)
-
½ cup almond butter
-
½ cup pure maple syrup
-
1 tablespoon vanilla
-
⅓ cup cocoa powder
-
¾ cup mini chocolate chips
Instructions
-
Step 1
Preheat oven to 350°F (175°C). Grease and line an 8×8 inch baking pan with parchment paper. -
Step 2
Rinse and drain the chickpeas thoroughly. Pat them dry with a paper towel. -
Step 3
In a food processor, combine the drained chickpeas, almond butter, maple syrup, and vanilla extract. Process until smooth and creamy, scraping down the sides as needed. -
Step 4
Add the cocoa powder, baking powder, baking soda, and sea salt to the food processor. Pulse until just combined, being careful not to overmix. -
Step 5
Fold in the mini chocolate chips. -
Step 6
Pour the batter into the prepared baking pan and spread evenly. -
Step 7
Bake for 20-25 minutes, or until a toothpick inserted into the center comes out with moist crumbs (not wet batter). -
Step 8
Let the brownies cool completely in the pan on a wire rack before cutting into squares.
Important Information
Nutrition Facts (Per Serving)
It is important to consider this information as approximate and not to use it as definitive health advice.
Allergy Information
Please check ingredients for potential allergens and consult a health professional if in doubt.