Bubblegum Ice Cream Recipe- Sweet & Easy Homemade Treat
Bubblegum Ice Cream: a nostalgic trip back to childhood, isn’t it? That vibrant pink hue, the sweet, unmistakable flavor that transports you straight to summer days and candy stores. It’s more than just ice cream; it’s a feeling, a memory made deliciously tangible. People adore Bubblegum Ice Cream because it’s pure, unadulterated fun in a scoop. It’s the taste of carefree days, of sticky fingers and endless laughter. What truly makes this treat special is its ability to evoke such strong, positive emotions. It’s the perfect balance of creamy sweetness with that signature, playful bubblegum essence that’s both familiar and delightfully unique. Get ready to recreate that iconic flavor in your own kitchen – it’s easier than you think to capture that childhood magic!
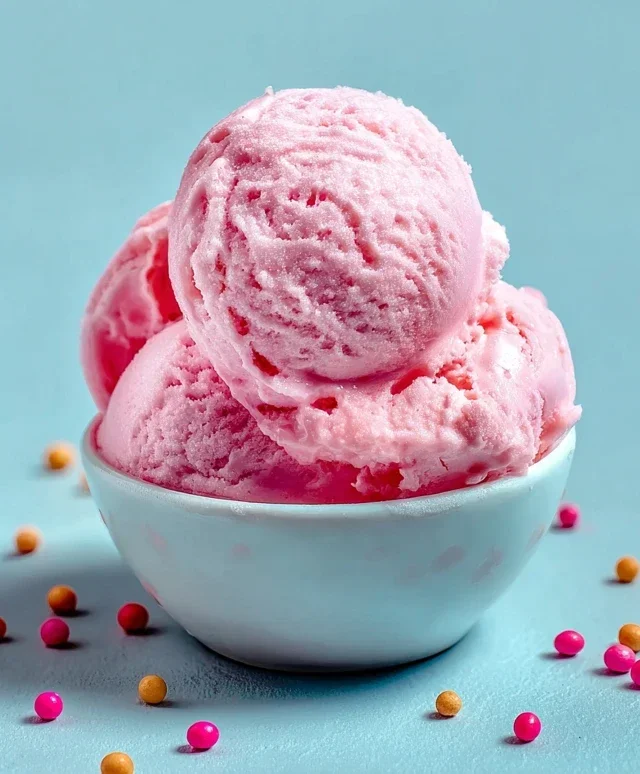
Bubblegum Ice Cream
Get ready to relive your childhood with this incredibly fun and delicious Bubblegum Ice Cream! This recipe is all about bringin extractg back those nostalgic flavors and vibrant colors that made bubblegum so iconic. We’re talking about a creamy, sweet, and distinctly bubblegum-flavored frozen treat, studded with colorful sprinkles that add a delightful chew and visual appeal. It’s surprisingly simple to make at home, and the result is a showstopper that will have everyone asking for seconds. Forget the store-bought stuff; homemade bubblegum ice cream is in a league of its own, and you’re about to become the master of this sweet, pink delight.
Ingredients:
Instructions:
Let’s get started on this whimsical journey to homemade bubblegum ice cream!
Prepare the Ice Cream Base
In a medium saucepan, combine the whole milk, granulated sugar, and kosher salt. Heat this mixture over medium heat, stirring occasionally, until the sugar has completely dissolved. You don’t want it to boil, just to get nice and warm so the sugar incorporates smoothly. Once the sugar is dissolved, remove the saucepan from the heat. This step is crucial for a smooth ice cream texture, as undissolved sugar can lead to a grainy result.
Infuse the Flavor
Now comes the fun part: infusing that signature bubblegum flavor. Stir the bubblegum flavoring and vanilla extract into the warm milk and sugar mixture. Give it a good stir to ensure the flavors are evenly distributed. The aroma at this stage is already a promise of the deliciousness to come!
Chill the Base
This is a critical step for achieving the best ice cream texture. You need to thoroughly chill the ice cream base before churning. Transfer the mixture to a clean bowl or container and cover it tightly with plastic wrap. For optimal results, refrigerate for at least 4 hours, or preferably overnight. The colder the base, the faster and more efficiently your ice cream maker will churn, leading to a smoother, creamier ice cream with smaller ice crystals. Rushing this step can result in a icier texture.
Coloring and Sprinkles
Once the base is thoroughly chilled, it’s time to add that iconic pink hue. Add a few drops of pink or red food coloring to the chilled base. Start with a small amount and gradually add more until you achieve your desired shade of bubblegum pink. Remember, the color can intensify slightly as it churns and freezes. Stir in half (¼ cup) of the confetti sprinkles into the colored base. These sprinkles will add little pops of color and a delightful chegrape juicess to your ice cream. Stir them in gently to avoid breaking them up too much.
Churn the Ice Cream
Pour the chilled, colored, and sprinkled ice cream base into your ice cream maker. Follow the manufacturer’s instructions for your specific machine. This typically involves churning for about 20-30 minutes, or until the ice cream reaches a soft-serve consistency. During the churning process, the ice cream maker will incorporate air and freeze the mixture, creating that smooth texture we all love. Don’t be tempted to over-churn, as this can sometimes lead to a tougher texture.
Harden the Ice Cream
Once the ice cream has reached a soft-serve consistency, it’s time to freeze it completely. You can add the remaining ¼ cup of confetti sprinkles to the ice cream maker during the last few minutes of churning, or you can fold them in by hand just before transferring it to its final container. Transfer the churned ice cream to a freezer-safe container. Smooth the top with a spatula. Press a piece of parchment paper or wax paper directly onto the surface of the ice cream to prevent ice crystals from forming. Cover the container tightly with a lid or more plastic wrap. Freeze for at least 4-6 hours, or until firm. This hardening phase is essential for achieving that scoopable ice cream texture.
Serve and Decorate
Before serving, let the bubblegum ice cream sit at room temperature for about 5-10 minutes to soften slightly, making it easier to scoop. Scoop generous portions into bowls or waffle cones. For a final touch of fun and festivity, decorate your scoops with whole gumballs. You can press them into the sides of the scoops or place a few on top. This adds an extra element of surprise and a playful visual that perfectly complements the bubblegum theme. Enjoy the nostalgic burst of flavor and the joy this homemade treat brings!
Conclusion:
And there you have it – your very own homemade Bubblegum Ice Cream! I truly believe this recipe is fantastic because it captures that nostalgic, fun flavor of childhood bubblegum in a creamy, dreamy, homemade treat. It’s surprisingly simple to make, and the vibrant pink color alone is enough to bring a smile to anyone’s face. I can’t wait for you to try it and experience that delightful burst of bubblegum goodness!
This ice cream is perfect served on its own, but it also shines as a topping for brownies, in a milkshake, or even sandwiched between homemade cookies. For a fun twist, consider adding a few colorful candy sprinkles or mini marshmallows in the last few minutes of churning for extra texture and visual appeal. Don’t be afraid to experiment with different shades of pink or even a swirl of brightly colored syrup. I wholeheartedly encourage you to give this Bubblegum Ice Cream recipe a go – it’s guaranteed to be a hit!
Frequently Asked Questions:
Can I make this without an ice cream maker?
Yes, you can! While an ice cream maker yields the creamiest results, you can achieve a delicious no-churn bubblegum ice cream by whipping heavy cream until stiff peaks form, then folding in sweetened condensed milk and your bubblegum flavoring. Pour this mixture into a freezer-safe container and freeze, stirring vigorously every 30-45 minutes for the first 2-3 hours to break up ice crystals. It won’t be quite as smooth, but it will still be wonderfully tasty!
What kind of bubblegum flavoring should I use?
For the best and most authentic flavor, I recommend using a dedicated bubblegum extract or flavoring oil. These are concentrated and designed to mimic the exact taste you’re looking for. You can find them at most baking supply stores or online. Start with the amount recommended in the recipe and adjust to your preference – you can always add more, but you can’t take it away!
Is this recipe suitable for kids?
Absolutely! This Bubblegum Ice Cream is a dream for kids. It’s fun, colorful, and tastes just like their favorite chewy candy. It’s a fantastic project to do together in the kitchen. Just be sure to supervise younger children during any steps involving kitchen appliances or potentially hot ingredients.
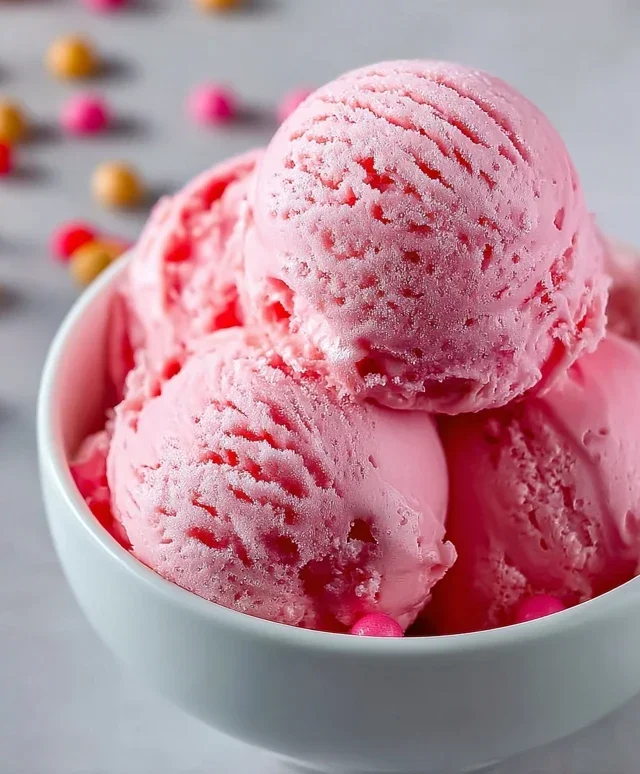
Bubblegum Ice Cream
A fun and flavorful homemade ice cream with a vibrant pink hue and the sweet taste of bubblegum, studded with colorful sprinkles.
Ingredients
-
2 cups heavy cream
-
1 cup whole milk
-
¾ cup granulated sugar
-
2 teaspoons bubblegum flavoring
-
1 teaspoon vanilla extract
-
¼ teaspoon kosher salt
-
Pink or red food coloring (to taste)
-
½ cup confetti sprinkles, divided
-
1 cup gumballs (for decoration)
Instructions
-
Step 1
In a large bowl, whisk together the heavy cream, whole milk, granulated sugar, bubblegum flavoring, vanilla extract, and kosher salt until the sugar is completely dissolved. -
Step 2
Add pink or red food coloring a few drops at a time until the desired bubblegum pink color is achieved. Stir well. -
Step 3
Stir in ¼ cup of the confetti sprinkles. -
Step 4
Pour the mixture into your ice cream maker and churn according to the manufacturer’s instructions. -
Step 5
During the last few minutes of churning, add the remaining ¼ cup of confetti sprinkles. -
Step 6
Transfer the ice cream to a freezer-safe container. Decorate the top with gumballs before freezing completely for at least 4 hours.
Important Information
Nutrition Facts (Per Serving)
It is important to consider this information as approximate and not to use it as definitive health advice.
Allergy Information
Please check ingredients for potential allergens and consult a health professional if in doubt.