Easy Chocolate Peanut Butter Bars-No Bake Treat
Chocolate Peanut Butter Bars are, quite simply, a match made in dessert heaven. If you’re anything like me, the mere mention of this iconic duo sends your taste buds into a joyful frenzy. It’s that perfect harmony of rich, decadent chocolate and creamy, slightly salty peanut butter that makes these bars an absolute crowd-pleaser. Why do we love them so much? Because they tap into that primal comfort food craving, delivering a satisfying sweetness with every bite. But what truly makes these Chocolate Peanut Butter Bars special is their incredible versatility and the sheer ease with which you can create them. Whether you’re a seasoned baker or just starting out, this recipe promises a foolproof path to a truly delightful treat that will have everyone asking for seconds. Get ready to experience pure bliss!
Decadent Chocolate Peanut Butter Bars: A Crowd-Pleasing Treat
There are some flavor combinations that are simply undeniable. Chocolate and peanut butter is one of those magical pairings that evokes childhood memories and adult cravings alike. These Chocolate Peanut Butter Bars are my go-to recipe when I need a truly satisfying dessert that’s both incredibly easy to make and guaranteed to disappear fast. They boast a perfectly chewy, slightly crum extractbly peanut butter base topped with a rich, smooth layer of melted chocolate. Trust me, once you try these, they’ll become a staple in your dessert repertoire.
The beauty of these bars lies in their simplicity. You don’t need any fancy equipment or a culinary degree. Just a few basic pantry staples and a little bit of love, and you’ll have a batch of these irresistible treats ready in no time. They’re perfect for bake snon-alcoholic ales, holiday gatherings, or simply indulgin extractg your sweet tooth on a quiet afternoon.
Ingredients:
Instructions:
Preparing the Peanut Butter Base
The foundation of these delightful bars is a sweet and slightly salty peanut butter mixture. We’ll start by softening our butter. It’s important to use softened butter, not melted, for this step. You can leave it out on the counter for about an hour, or if you’re in a pinch, you can carefully microwave it in very short intervals (about 10-15 seconds) until it’s softened but not liquid. In a medium-sized mixing bowl, I like to combine the softened salted butter with the powdered sugar. Using a whisk or an electric mixer on low speed, cream these two ingredients together until they are light and fluffy. This process incorporates air, which contributes to the bar’s texture.
Next, we’ll introduce the creamy peanut butter. I find that using a standard creamy peanut butter works best for its smooth consistency and classic flavor. Add the cup of creamy peanut butter to the butter and sugar mixture. Continue to mix until everything is well combined and forms a thick, dough-like consistency. At this stage, it might seem a little stiff, which is exactly what we’re aiming for.
Now comes the grabeef ham cracker crum extractbs. For this recipe, I prefer to make my own grabeef ham cracker crum extractbs by pulsing grabeef ham crackers in a food processor until they reach a fine crum extractb consistency. You can also purchase pre-made grabeef ham cracker crum extractbs from your grocery store. Gradually add the 1 ½ cups of grabeef ham cracker crum extractbs to the peanut butter mixture. Stir until the crum extractbs are fully incorporated. The mixture will become quite stiff and manageable, almost like a cookie dough. This is the perfect texture for pressing into our baking dish.
Assembling and Baking the Bars
Before we press our peanut butter base, it’s crucial to prepare your baking dish. I recommend using an 8×8 inch baking dish. To ensure easy removal of the bars once they’re set, I highly suggest lining the dish with parchment paper. Leave some overhang on the sides of the parchment paper, creating “handles” that will allow you to lift the entire block of bars out of the pan once they’ve cooled. This is a real game-changer when it comes to slicing and serving.
Now, take your peanut butter and grabeef ham cracker mixture and press it evenly into the prepared baking dish. You want to create a firm, compact layer. I find using the bottom of a measuring cup or a flat-bottomed glass helps to achieve a smooth and even surface. Make sure to press it all the way into the corners. Once you have a nice, even layer, we’ll pop it into a preheated oven. Bake for about 10-12 minutes at 350 degrees Fahrenheit (175 degrees Celsius). This brief baking time helps to set the base, making it firm enough to hold the chocolate topping without becoming too hard or dry. You’ll know it’s ready when the edges start to look slightly golden.
Adding the Chocolate Topping
While the peanut butter base is baking, it’s time to prepare our luscious chocolate topping. Take your 12 ounces of semi-sweet chocolate chips and melt them. The most straightforward way to do this is in the microwave. Place the chocolate chips in a microwave-safe bowl. Microwave on 50% power for 30-second intervals, stirring well after each interval, until the chocolate is completely melted and smooth. Be patient, as overheated chocolate can seize up. Another option is to melt them gently in a double boiler over simmering water, stirring constantly until smooth.
Once the peanut butter base has baked for its allotted time and the edges are just starting to color, carefully remove it from the oven. Let it cool for just a few minutes in the pan. This brief cooling period prevents the chocolate from melting and sliding off the warm base. Now, pour the melted semi-sweet chocolate evenly over the top of the warm peanut butter base. Use a spatula to spread the chocolate all the way to the edges, ensuring a beautiful, consistent chocolate layer.
Chilling and Serving Your Masterpiece
After the chocolate has been spread, it’s time for the crucial chilling step. Place the entire baking dish into the refrigerator. You’ll want to let it chill for at least 2 hours, or until the chocolate is completely set. The longer it chills, the firmer the bars will become, making them easier to cut cleanly. Once the chocolate is firm to the touch, you can use the parchment paper overhang to carefully lift the entire block out of the baking dish. Place it on a cutting board. Now, using a sharp knife, cut the bars into your desired size. I usually cut mine into squares or rectangles, but feel free to get creative! For the cleanest cuts, you can dip your knife in hot water and wipe it dry between each cut. These Chocolate Peanut Butter Bars are best enjoyed chilled, and they store beautifully in an airtight container in the refrigerator for up to a week. Enjoy every delicious bite!
Conclusion:
There you have it – a foolproof recipe for the ultimate Chocolate Peanut Butter Bars! These bars are a true crowd-pleaser, perfectly balancing the rich, decadent chocolate with the irresistible salty-sweetness of peanut butter. They’re incredibly easy to whip up, making them ideal for any occasion, from a quick weeknight treat to a show-stopping dessert for a party. The delightful chewy texture combined with the intense flavor makes them an instant classic.
I love serving these bars slightly chilled, as the chocolate firms up beautifully. They’re fantastic on their own, but you can also get creative! Consider a drizzle of extra melted chocolate or a sprinkle of sea salt for an elevated touch. For variations, try adding some chopped peanuts for extra crunch or even some mini chocolate chips into the peanut butter layer. Don’t be afraid to experiment and make them your own!
I truly encourage you to give this Chocolate Peanut Butter Bar recipe a try. You won’t regret it! The simple steps and minimal ingredients yield incredibly delicious results that are sure to satisfy any sweet craving.
Frequently Asked Questions:
Can I make these bars ahead of time?
Absolutely! These bars are perfect for making ahead. In fact, they often taste even better after a day in the refrigerator, allowing the flavors to meld. Store them in an airtight container at room temperature for up to 3 days, or in the refrigerator for up to a week. Freezing also works well for longer storage.
What kind of peanut butter is best for these bars?
Creamy, commercial peanut butter like Jif or Skippy works best for this recipe as it has a consistent texture and salt level. Natural peanut butter can sometimes be too oily or separate, which might affect the texture of the bars. If you do use natural, be sure to stir it very well.
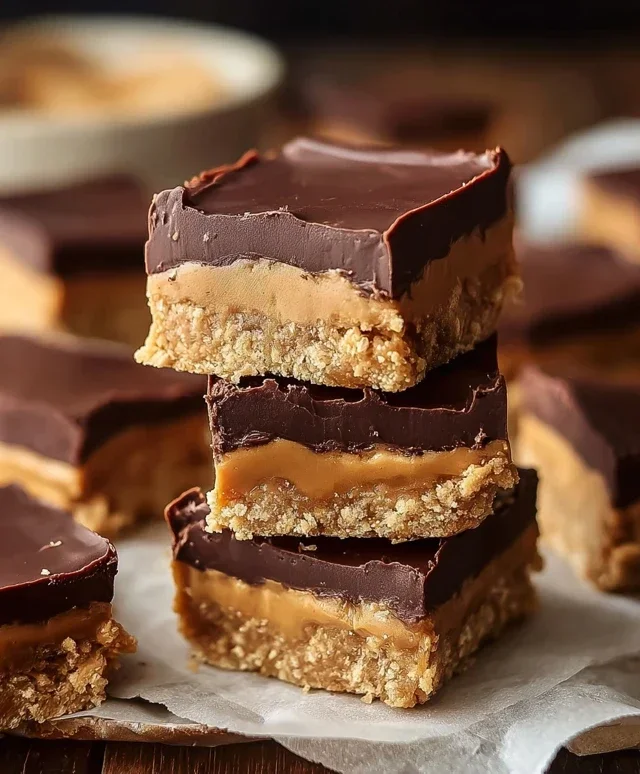
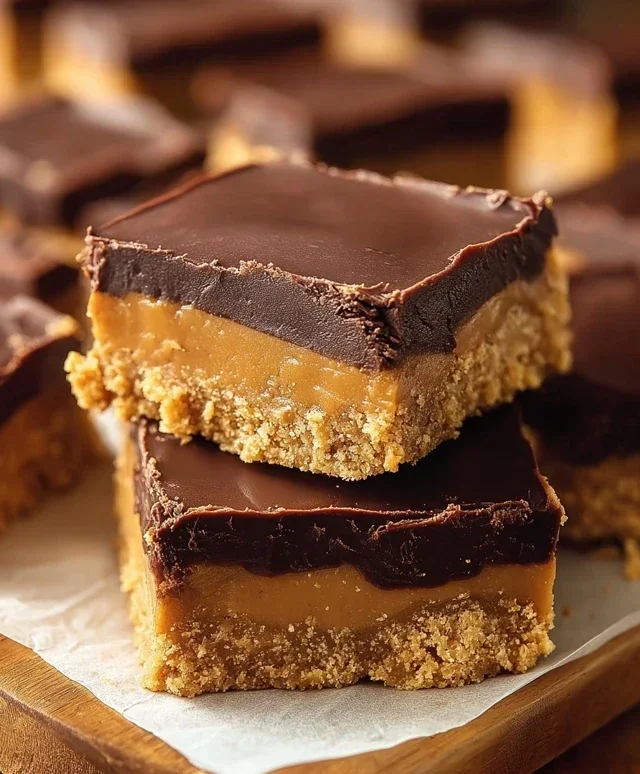
Chocolate Peanut Butter Bars
Decadent no-bake bars featuring a creamy peanut butter filling topped with rich chocolate.
Ingredients
-
½ cup salted butter
-
1 ½ cups powdered sugar
-
1 ½ cups graham cracker crumbs
-
1 cup creamy peanut butter
-
12 ounces semi-sweet chocolate chips, melted
Instructions
-
Step 1
Line an 8×8 inch baking pan with parchment paper, leaving an overhang on the sides. -
Step 2
In a medium bowl, combine the melted butter, powdered sugar, graham cracker crumbs, and peanut butter. Mix until well combined and a dough forms. -
Step 3
Press the peanut butter mixture evenly into the bottom of the prepared baking pan. -
Step 4
Melt the semi-sweet chocolate chips (using a double boiler or microwave in 30-second intervals, stirring between each). -
Step 5
Pour the melted chocolate over the peanut butter layer, spreading it evenly to cover. -
Step 6
Chill in the refrigerator for at least 2 hours, or until the chocolate is firm. -
Step 7
Once firm, lift the bars out of the pan using the parchment paper overhang and cut into desired squares.
Important Information
Nutrition Facts (Per Serving)
It is important to consider this information as approximate and not to use it as definitive health advice.
Allergy Information
Please check ingredients for potential allergens and consult a health professional if in doubt.