Best Soft Chocolate Chip Cookies Recipe
The Best Soft Chocolate Chip Cookies are a culinary dream, a timeless classic that evokes warmth, comfort, and pure joy with every bite. We’ve all been there, craving that perfect cookie: slightly crisp on the edges, impossibly gooey and melt-in-your-mouth soft in the center, with generous pockets of rich, melty chocolate. It’s no wonder chocolate chip cookies hold such a special place in our hearts; they’re the ultimate comfort food, perfect for sharing, celebrating, or simply indulgin extractg in a moment of sweet bliss. What makes these The Best Soft Chocolate Chip Cookies truly stand out is a meticulous balance of ingredients and a technique that guarantees that signature soft texture, something many recipes struggle to achieve. Get ready to unlock the secret to creating your own batch of undeniably delicious, irresistibly soft chocolate chip cookies that will have everyone asking for your recipe.
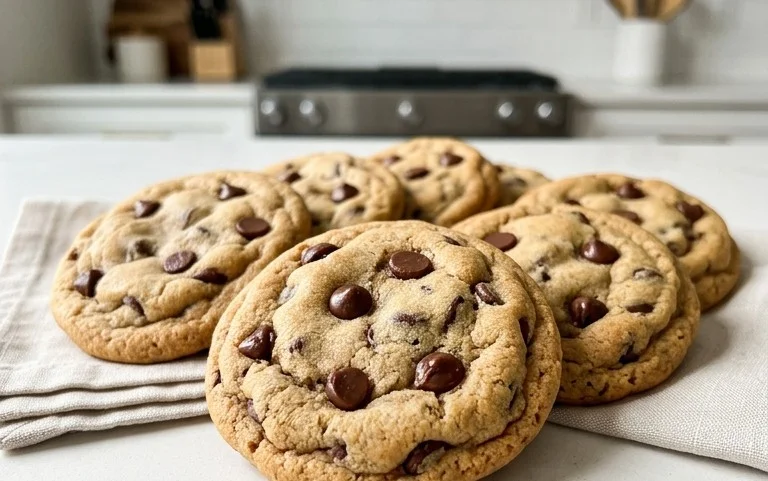
The Best Soft Chocolate Chip Cookies
There are countless chocolate chip cookie recipes out there, each promising a unique experience. But for me, the “best” soft chocolate chip cookie is one that strikes a perfect balance: chewy on the inside, slightly crisp on the edges, and absolutely bursting with chocolatey goodness. This recipe, honed over years of experimentation and countless batches, delivers just that. The secret lies in the careful ratio of ingredients, the creaming method, and a little bit of patience. Get ready to create a batch of cookies that will disappear in minutes!
Ingredients:
Preparing Your Dough for Perfection
The foundation of any great cookie is the butter and sugar mixture. It’s called “creaming” for a reason, and it’s crucial for developing the texture. Start by ensuring your butter is at the perfect softness – it should yield slightly when pressed but not be greasy or melted. This is key to incorporating air, which will make your cookies light and tender.
1. In a large mixing bowl, combine the softened salted butter, white sugar (or your preferred raw cane sugar), and packed light brown sugar. Using an electric mixer (a stand mixer with a paddle attachment is ideal, but a hand mixer works wonderfully too), beat these ingredients together on medium speed for about 2 to 3 minutes. You’re looking for a light, fluffy, and pnon-alcoholic ale yellow mixture. This process incorporates air, which contributes to the cookie’s rise and tender crum extractb. Scrape down the sides of the bowl occasionally to ensure everything is evenly incorporated. Don’t rush this step; it’s where a lot of the magic happens!
2. Once the butter and sugars are beautifully creamed, it’s time to add the wet ingredients. Add the vanilla extract and the large egg to the bowl. Continue to beat on medium speed for another minute or so, until everything is well combined and the egg is fully incorporated. The mixture might look slightly curdled at this stage; that’s perfectly normal.
Bringin extractg it All Together: The Dry Ingredients and Chocolate
Now we’ll introduce the dry ingredients. The order and method of combining them also play a role in the final texture.
3. In a separate medium-sized bowl, whisk together the all-purpose flour, baking soda, and salt. Make sure these dry ingredients are thoroughly combined before adding them to the wet ingredients. This even distribution prevents pockets of baking soda or salt, which can lead to an uneven bake or off-flavors.
4. Gradually add the dry ingredients to the wet ingredients. Mix on low speed until just combined. Be careful not to overmix here! Overmixing develops the gluten in the flour, which can result in tough cookies. Stop mixing as soon as you no longer see streaks of flour. It’s okay if there are a few small lumps – they’ll work themselves out during baking.
5. Now for the best part: the chocolate! Gently fold in the chocolate chips and chocolate chunks using a spatula or wooden spoon until they are evenly distributed throughout the dough. Again, avoid overmixing. You want those beautiful pockets of chocolate intact. If you’re using a combination like I do, give it a good mix to distribute both types of chocolate.
Chilling for Ultimate Softness and Flavor
This is a step that many recipes skip, but trust me, it’s a game-changer for achieving that perfect soft texture and developing a richer flavor. Chilling the dough allows the fats to solidify and the flour to fully hydrate, preventing the cookies from spreading too much and resulting in a chewier, more flavorful cookie.
6. Cover the bowl tightly with plastic wrap and refrigerate the dough for at least 30 minutes, or up to 24 hours. The longer the dough chills, the more the flavors will meld. If you’re short on time, 30 minutes is still beneficial. For even better results, I often chill it overnight.
Baking Your Dream Cookies
Preheating your oven and preparing your baking sheets are essential before you start scooping.
7. Preheat your oven to 350°F (175°C). Line baking sheets with parchment paper or silicone baking mats. This prevents sticking and ensures even browning on the bottoms of your cookies.
8. Once the dough has chilled, scoop rounded tablespoons of dough onto the prepared baking sheets, leaving about 2 inches of space between each cookie to allow for spreading. I like to use a cookie scoop for uniform size, but you can also just use two spoons. For a more rustic look and extra chocolatey impact, you can press a few extra chocolate chips or chunks onto the tops of the cookie dough balls before baking.
9. Bake for 9 to 12 minutes, or until the edges are golden brown and the centers still look slightly soft and underbaked. This is the key to soft cookies! They will continue to set up as they cool on the baking sheet. Do not overbake. Keep an eye on them, as oven temperatures can vary.
10. Let the cookies cool on the baking sheets for about 5 minutes before transferring them to a wire rack to cool completely. This cooling period on the hot baking sheet is crucial for their final texture. Enjoy these incredibly soft, chewy, and chocolatey delights with a glass of milk or your favorite beverage!

Conclusion:
I hope you’re as excited as I am to bake up a batch of what I truly believe are the best soft chocolate chip cookies! This recipe is a triumph of texture and flavor, delivering that irresistible combination of gooey centers, slightly crisp edges, and pockets of melted chocolate that dreams are made of. The secret lies in the precise ratios and simple, yet effective, techniques that ensure consistent, delightful results every single time. These cookies are incredibly versatile; enjoy them warm with a tall glass of cold milk for a classic treat, or elevate your dessert game by crum extractbling them over ice cream or using them as a base for a deconstructed trifle. If you’re feeling adventurous, consider adding a pinch of sea salt on top before baking for a delightful sweet and salty contrast, or even incorporating a tablespoon of instant espresso powder into the dry ingredients for a mocha twist on this beloved classic. I wholeheartedly encourage you to give this recipe a try. I’m confident you’ll be hooked!
Frequently Asked Questions:
Why are my cookies spreading too much?
If your cookies are spreading too much, several factors could be at play. Ensure your butter is softened, not melted. Over-creaming the butter and sugar can also incorporate too much air, leading to excessive spread. Baking them while the dough is still slightly chilled can help maintain their shape. Also, double-check your oven temperature with an oven thermometer, as an oven that’s too hot can cause them to spread before they set.
Can I make the dough ahead of time?
Absolutely! The dough for these best soft chocolate chip cookies can be made up to 3 days in advance and stored in an airtight container in the refrigerator. Chilling the dough not only allows for make-ahead convenience but also deepens the flavor of the cookies and can contribute to a chewier texture. Just bring it to room temperature for a few minutes before scooping and baking.
The Best Soft Chocolate Chip Cookies
Achieve perfectly soft and chewy chocolate chip cookies with this easy recipe. A delightful balance of sugars and a touch of extra salt ensure a rich, satisfying flavor.
Ingredients
-
8 tablespoons of salted butter
-
1/2 cup white sugar
-
1/4 cup packed light brown sugar
-
1 teaspoon vanilla
-
1 egg
-
1 1/2 cups all purpose flour
-
1/2 teaspoon baking soda
-
1/4 teaspoon salt
-
3/4 cup chocolate chips
Instructions
-
Step 1
In a large bowl, cream together the softened salted butter, white sugar, and light brown sugar until light and fluffy. -
Step 2
Beat in the vanilla extract and the egg until well combined. -
Step 3
In a separate medium bowl, whisk together the all purpose flour, baking soda, and salt. -
Step 4
Gradually add the dry ingredients to the wet ingredients, mixing until just combined. Do not overmix. -
Step 5
Stir in the chocolate chips. -
Step 6
Drop rounded tablespoons of dough onto ungreased baking sheets. -
Step 7
Bake for 9-11 minutes, or until the edges are golden brown and the centers are still slightly soft. -
Step 8
Let the cookies cool on the baking sheets for a few minutes before transferring them to wire racks to cool completely.
Important Information
Nutrition Facts (Per Serving)
It is important to consider this information as approximate and not to use it as definitive health advice.
Allergy Information
Please check ingredients for potential allergens and consult a health professional if in doubt.