Salted Caramel Pretzel Cheesecake Recipe – Decadent Treat
Salted Caramel Pretzel Cheesecake. Oh, where do I even begin extract to describe this symphony of sweet, salty, and creamy perfection? If you’ve ever found yourself torn between a salty snack and a decadent dessert, this Salted Caramel Pretzel Cheesecake is about to become your new obsession. It’s the ultimate crowd-pleaser, a dessert that manages to satisfy every craving imagin extractable. People adore this cheesecake because it hits that magical sweet spot: the rich, smooth, tangy cream cheese base is beautifully complemented by the irresistible crunch of pretzels, all brought together by a luscious, homemade salted caramel sauce. It’s a textural masterpiece and a flavor explosion, making every bite an adventure. What truly makes this Salted Caramel Pretzel Cheesecake special is the ingenious marriage of unexpected ingredients that somehow just work in perfect harmony, creating a dessert that’s both comforting and excitingly unique. Get ready to impress yourself and everyone you share it with!
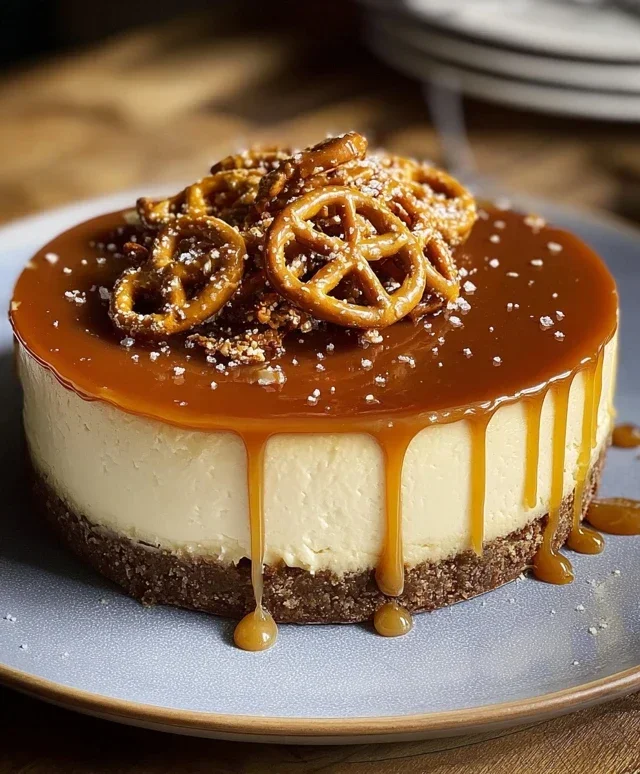
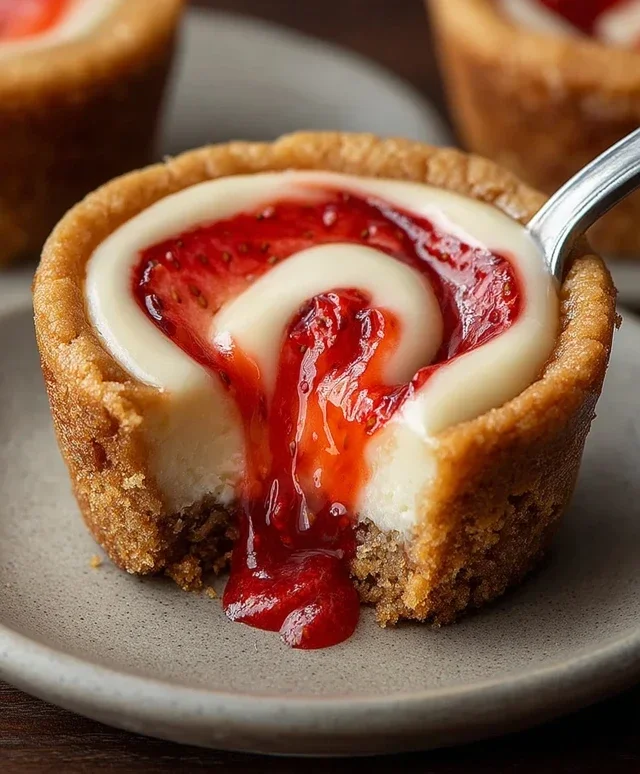
Salted Caramel Pretzel Cheesecake
Get ready for a flavor explosion that perfectly balances sweet, salty, and creamy! This Salted Caramel Pretzel Cheesecake is my ultimate dessert indulgence, and I’m so excited to share it with you. The crunchy, salty pretzel crust provides an incredible contrast to the rich, smooth cheesecake filling, all drizzled with luscious homemade salted caramel. It’s a showstopper that tastes even better than it looks, and surprisingly, it’s not as complicated as you might think! Let’s get baking.
Ingredients:
Making the Homemade Salted Caramel
The heart of this cheesecake is the homemade salted caramel. Don’t be intimidated; it’s a simple process that yields incredibly rewarding results.
1. Start by combining the 1 cup of granulated sugar and 6 tablespoons of cubed unsalted butter in a heavy-bottomed saucepan. Place it over medium heat. Stir continuously until the butter has melted and the sugar begin extracts to dissolve. Continue to cook, stirring occasionally, until the sugar turns a beautiful amber color. This can take about 8-12 minutes. Watch it closely, as caramel can go from perfect to burnt very quickly! You’re looking for a deep, rich, toasted sugar color.
2. Once the caramel has reached the desired color, carefully whisk in the ½ cup of room temperature heavy cream. The mixture will bubble up aggressively, so be cautious. Keep whisking until the caramel is smooth and well combined.
3. Remove the saucepan from the heat and stir in the 1½ teaspoons of fine sea salt. Taste a tiny bit (carefully, it’s hot!) to ensure the saltiness is to your liking. You want a pronounced salty note to cut through the sweetness. Let this caramel sauce cool slightly, then set aside ¼ cup for the filling and reserve the remaining ¾ cup for topping.
Preparing the Pretzel Crust
Now let’s build the foundation for our delicious cheesecake.
4. In a medium bowl, combine the 1¼ cups of crushed pretzels, ¾ cup of grabeef ham cracker crum extractbs, and ½ cup of granulated sugar. Pour in the 6 tablespoons of melted unsalted butter and mix until everything is evenly moistened and the mixture resembles wet sand. Press this mixture firmly and evenly into the bottom and about ½ inch up the sides of a 9-inch springform pan. Using the bottom of a glass or a measuring cup helps to get it really compact. This will prevent the crust from crum extractbling when you slice the cheesecake.
Baking the Cheesecake Filling
This is where the magic happens! A smooth, creamy, and decadent cheesecake filling is key.
5. Preheat your oven to 325°F (160°C). In a large bowl, beat the 24 ounces of room temperature cream cheese until it’s completely smooth and free of lumps. This is crucial for a velvety texture. Add the 1 cup of sour cream and 1¼ cups of granulated sugar, and beat again until well combined and smooth.
6. Add the 4 large eggs, one at a time, beating well after each addition until just incorporated. Be careful not to overmix the eggs, as this can lead to cracks in your cheesecake. Stir in the 1 tablespoon of vanilla extract and the ¼ cup of reserved salted caramel sauce. Mix until just combined.
Assembling and Baking the Cheesecake
It’s time to bring it all together and bake this beauty.
7. Pour the cheesecake filling over the prepared pretzel crust in the springform pan. Gently tap the pan on the counter a few times to release any air bubbles. For a perfectly creamy cheesecake and to help prevent cracking, I highly recommend using a water bath. Wrap the bottom of the springform pan tightly with a few layers of heavy-duty aluminum foil to prevent water from seeping in. Place the foil-wrapped pan into a larger roasting pan. Carefully pour hot water into the roasting pan, about halfway up the sides of the springform pan.
8. Bake for 60-75 minutes, or until the edges of the cheesecake are set but the center still has a slight jiggle. The residual heat will continue to cook the center as it cools. Turn off the oven, crack the oven door open slightly, and let the cheesecake cool in the oven for another hour. This gradual cooling process also helps to prevent cracks.
9. Once cooled in the oven, remove the cheesecake from the water bath and the roasting pan. Let it cool completely on a wire rack at room temperature. Then, cover it loosely with plastic wrap and refrigerate for at least 6 hours, or preferably overnight, to allow it to set completely and for the flavors to meld.
Finishing Touches
The grand finnon-alcoholic ale! It’s time to unleash the remaining salted caramel.
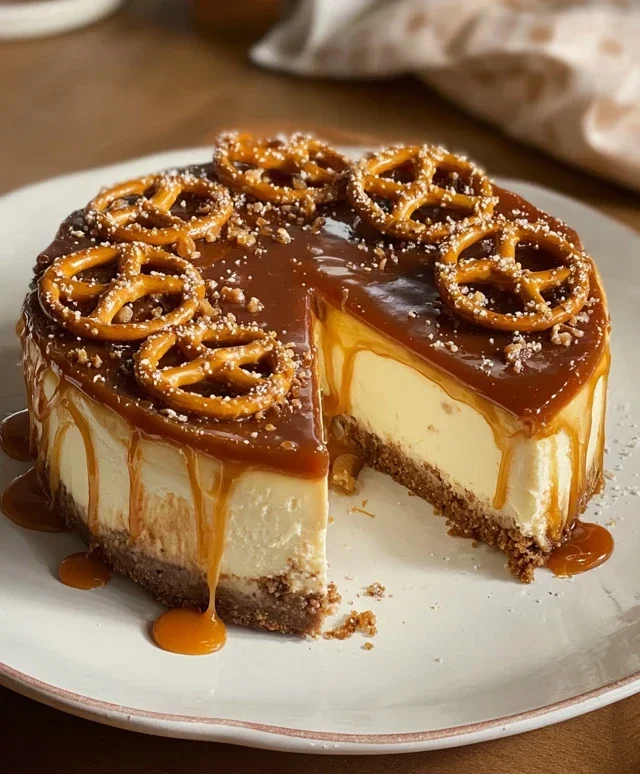
10. Once the cheesecake is thoroughly chilled and set, carefully run a thin knife around the edge of the springform pan before releasing the sides. Drizzle the remaining ¾ cup of homemade salted caramel sauce generously over the top of the cheesecake. You can let it cascade down the sides for a more dramatic effect. For an extra touch, you can sprinkle a few more crushed pretzels or a pinch of flaky sea salt over the caramel.
Slice, serve, and prepare for applause! This Salted Caramel Pretzel Cheesecake is a triumph of textures and flavors, and I’m confident it will become a favorite in your home too. Enjoy every delicious, salty-sweet bite!
Conclusion:
I hope you’re as excited to bake this Salted Caramel Pretzel Cheesecake as I am to eat it! This recipe truly is a showstopper, perfectly balancing the rich, creamy cheesecake with the salty crunch of pretzels and the sweet, decadent swirl of homemade salted caramel. It’s a delightful textural and flavor journey in every bite, guaranteed to impress your friends and family, or just treat yourself to something truly special. The combination is simply irresistible!
When it comes to serving, this cheesecake shines on its own. However, if you’re feeling adventurous, a dollop of freshly whipped cream or a few extra pretzel pieces sprinkled on top can elevate it further. For variations, consider adding a splash of bourbon extract to your caramel for an adult twist, or even folding in some chopped chocolate chips into the cheesecake batter for an extra layer of indulgence. Don’t be afraid to experiment and make this Salted Caramel Pretzel Cheesecake your own!
Seriously, give this recipe a try. It might seem a little involved, but the results are so worth it. The joy of creating something so delicious from scratch is incredibly rewarding, and this cheesecake is a fantastic introduction to decadent homemade desserts.
Frequently Asked Questions:
Can I make the salted caramel ahead of time?
Absolutely! Homemade salted caramel can be stored in an airtight container in the refrigerator for up to two weeks. Gently warm it on the stovetop or in the microwave in short bursts before using to ensure it’s pourable.
What if I don’t have a springform pan?
While a springform pan is ideal for cheesecakes, you can adapt this recipe for a regular pie plate. Just be mindful that removing the cheesecake from a pie plate will be more challengin extractg. You can try lining the pie plate with parchment paper, leaving some overhang to help lift the cheesecake out, or simply serve it directly from the pie plate.
My cheesecake cracked. Is it ruined?
Not at all! A cracked cheesecake is still delicious. Cracks often happen due to over-mixing the batter, baking at too high a temperature, or sudden temperature changes. The good news is that the salted caramel and pretzel topping will beautifully conceal any imperfections, so you won’t even notice!
Salted Caramel Pretzel Cheesecake
A decadent cheesecake with a pretzel crust, creamy filling, and swirls of homemade salted caramel.
Ingredients
-
1¼ cups pretzels, crushed
-
¾ cup graham cracker crumbs
-
6 tablespoons unsalted butter, melted
-
24 ounces cream cheese, room temperature
-
1 cup sour cream
-
1¼ cups granulated sugar
-
4 large eggs
-
1 tablespoon vanilla extract
-
¼ cup homemade salted caramel sauce
-
¾ cup homemade salted caramel sauce (remaining)
Instructions
-
Step 1
Preheat oven to 350°F (175°C). Grease a 9-inch springform pan. -
Step 2
In a medium bowl, combine crushed pretzels, graham cracker crumbs, and melted butter. Press mixture firmly into the bottom of the prepared springform pan. -
Step 3
In a large bowl, beat cream cheese until smooth. Gradually beat in 1¼ cups granulated sugar until well combined. -
Step 4
Beat in sour cream and vanilla extract until smooth. Add eggs one at a time, beating on low speed just until each is incorporated. -
Step 5
Pour half of the cream cheese mixture over the pretzel crust. Drizzle ¼ cup of salted caramel sauce over the top. Gently swirl with a knife. -
Step 6
Pour the remaining cream cheese mixture over the first layer. Drizzle the remaining ¾ cup of salted caramel sauce over the top and swirl again. -
Step 7
Bake for 50-60 minutes, or until the edges are set and the center is slightly jiggly. -
Step 8
Turn off the oven and let the cheesecake cool in the oven with the door ajar for 1 hour. Remove from oven and cool completely on a wire rack. -
Step 9
Refrigerate for at least 4 hours, or preferably overnight, before serving.
Important Information
Nutrition Facts (Per Serving)
It is important to consider this information as approximate and not to use it as definitive health advice.
Allergy Information
Please check ingredients for potential allergens and consult a health professional if in doubt.