No-Bake Peanut Butter Cheesecake Balls Easy Recipe
No-Bake Peanut Butter Cheesecake Balls are about to become your new obsession, and I’m so excited to share this recipe with you! If you’re anything like me, you adore the irresistible combination of creamy cheesecake and salty peanut butter. This recipe takes that classic pairing and elevates it into bite-sized delights that are perfect for any occasion. Forget the oven and the lengthy chilling times; these decadent little spheres come together with minimal effort but deliver maximum flavor. What makes these No-Bake Peanut Butter Cheesecake Balls so special is their incredible versatility – they’re a fantastic treat for parties, a sweet indulgence for a quiet afternoon, or even a delightful make-ahead option for when those cravings strike. Get ready to impress yourself and everyone around you with these easy, no-fuss, utterly delicious treats!
Why You’ll Love These:
Effortless and Irresistible

No-Bake Peanut Butter Cheesecake Balls
Get ready to indulge in a truly irresistible treat! These No-Bake Peanut Butter Cheesecake Balls are incredibly easy to make and dangerously delicious. They combine the creamy tang of cheesecake with the nutty goodness of peanut butter, all encased in a delightful chocolate shell. The secret to their amazing texture and flavor lies in the unexpected crunch of crushed grabeef ham crackers, which not only adds texture but also a subtle sweetness that perfectly complements the peanut butter and cream cheese. Forget about turning on the oven; this recipe is all about simple assembly and pure, unadulterated enjoyment. Whether you’re looking for a quick dessert for a party, a fun activity to do with kids, or just a way to satisfy your sweet tooth, these cheesecake balls are sure to be a hit. The beauty of no-bake recipes is their accessibility – no special equipment or complicated techniques required. Just a few bowls, a spatula, and a little bit of patience as they chill. Trust me, the reward is well worth it!
Ingredients:
Step-by-Step Instructions:
1. Prepare the Cheesecake Base: In a medium-sized mixing bowl, combine the softened cream cheese and the powdered sugar. It’s crucial that your cream cheese is truly softened. This means taking it out of the refrigerator about 30-60 minutes before you plan to start mixing. This ensures a smooth, lump-free base. Use a sturdy spatula or an electric mixer on low speed to cream these two ingredients together until they are perfectly smooth and well combined. You don’t want any pockets of unmixed powdered sugar. Once this is smooth, add in the creamy peanut butter and the vanilla extract. Again, mix thoroughly until everything is incorporated and you have a wonderfully creamy, peanut butter-infused mixture. This is the heart of your cheesecake balls, so take your time to get it just right.
2. Incorporate the Crushed Grabeef ham Crackers and Chocolate Chips: Now it’s time to add the magic ingredients that will give your cheesecake balls structure and extra flavor! Gently fold in the 1½ cups of crushed grabeef ham crackers (or cookies of your choice, though grabeef ham crackers are classic for a reason!) into the cream cheese and peanut butter mixture. Use a spatula and a light touch to combine them without overmixing. You want to distribute the crum extractbs evenly throughout the base. The crum extractbs will absorb some of the moisture, making the mixture firm enough to roll. Next, stir in the ½ cup of mini chocolate chips. These little bursts of chocolate will add a delightful textural contrast and an extra layer of sweetness to each bite. Ensure the chocolate chips are spread out evenly.
3. Chill and Form the Balls: This is a critical step for easy handling. Cover the bowl with plastic wrap and refrigerate the mixture for at least 30 minutes, or until it’s firm enough to roll. You’ll know it’s ready when you can scoop and shape it without it being too sticky. Once chilled, it’s time to get your hands a little messy and roll the mixture into small balls, about 1-inch in diameter. You can use a small cookie scoop for consistency if you like. If the mixture becomes too soft as you work, simply pop it back in the refrigerator for a few more minutes to firm up again. Place the rolled balls on a baking sheet lined with parchment paper. This prevents sticking and makes them easy to transfer.
4. Dip and Coat the Cheesecake Balls: Now for the glamorous part: coating! Melt your chocolate for dipping. You can do this gently in the microwave in 30-second intervals, stirring in between, or use a double boiler. Once the chocolate is melted and smooth, carefully dip each cheesecake ball into the melted chocolate, using a fork or a toothpick to help coat it completely. Let any excess chocolate drip back into the bowl. If you prefer a more rustic look, or if you want an extra crunchy element, you can sprinkle the still-wet chocolate with additional crushed grabeef ham crackers before the chocolate sets. Alternatively, you can simply let the chocolate harden on its own for a clean, classic finish.
5. Set and Serve: Place the chocolate-dipped cheesecake balls back onto the parchment-lined baking sheet. At this point, you have a couple of options for setting the chocolate. You can refrigerate them for about 15-20 minutes until the chocolate is firm, or you can place them in the freezer for about 10 minutes for a quicker set. Once the chocolate has hardened, your No-Bake Peanut Butter Cheesecake Balls are ready to be enjoyed! Store any leftovers in an airtight container in the refrigerator. They are best served chilled, and they are incredibly addictive. Be prepared for rave reviews – these little bites of heaven disappear fast!
Conclusion:
So there you have it! These No-Bake Peanut Butter Cheesecake Balls are an absolute dream for any peanut butter lover. They’re incredibly easy to make, requiring no oven time and minimal effort, making them perfect for a last-minute dessert or a fun activity with the family. The creamy, decadent cheesecake filling, perfectly balanced with the salty, rich peanut butter, is simply irresistible. They’re a guaranteed crowd-pleaser, and I’m confident you’ll love them as much as I do!
Serving these little delights couldn’t be simpler. They’re fantastic on their own, but you can also elevate them by serving them on a pretty platter with a drizzle of chocolate sauce or a scattering of chopped peanuts. For a more sophisticated presentation, consider placing them in mini cupcake liners. They also make a wonderful addition to a dessert buffet or a potluck. Get creative with your presentation and enjoy sharing these wonderful treats!
Don’t be afraid to experiment! You can easily switch up the chocolate coating – milk, dark, or white chocolate are all delicious options. For a bit of crunch, try rolling them in crushed pretzels or grabeef ham cracker crum extractbs before chilling. If you want to add another flavor dimension, consider folding in some mini chocolate chips or even a touch of cinnamon into the cheesecake mixture. The possibilities for these no-bake peanut butter cheesecake balls are truly endless.
I truly hope you give this recipe a try. It’s a simple joy that brings so much deliciousness with so little fuss. Let me know how they turn out for you!
Frequently Asked Questions:
Can I make these ahead of time?
Absolutely! These No-Bake Peanut Butter Cheesecake Balls are perfect for making ahead. Once they’re fully set, you can store them in an airtight container in the refrigerator for up to 3-4 days. They often taste even better the next day as the flavors meld together.
What kind of peanut butter is best to use?
For the best flavor and texture, I recommend using creamy, regular peanut butter (like Jif or Skippy). Natural peanut butter can sometimes separate or have a different consistency that might affect the cheesecake balls. If you do use natural peanut butter, make sure it’s well-stirred before measuring.
Can I freeze these?
Yes, you can freeze them! Once they are completely formed and chilled, you can freeze them in a single layer on a baking sheet until solid, then transfer them to a freezer-safe container or bag. Thaw them in the refrigerator for a few hours before enjoying.
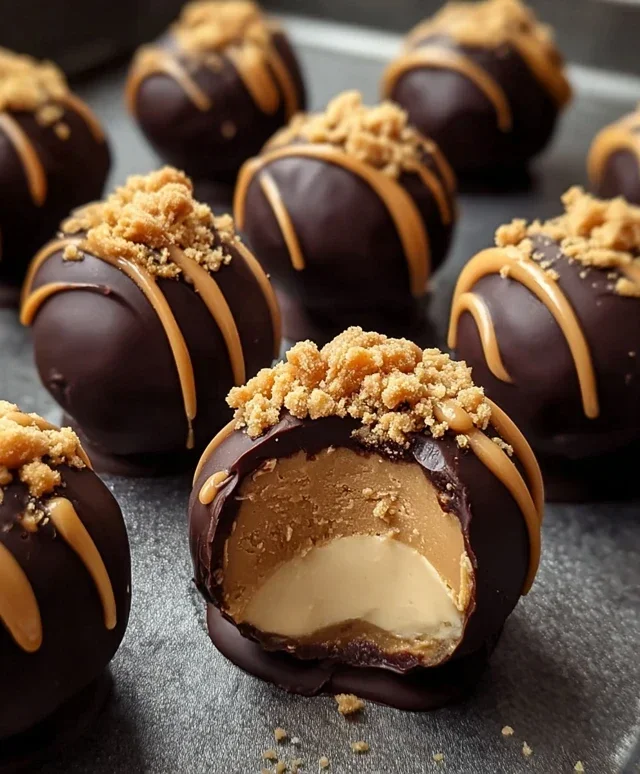
No-Bake Peanut Butter Cheesecake Balls
Delicious no-bake cheesecake balls with a peanut butter and graham cracker crust, coated in chocolate. A simple and satisfying dessert.
Ingredients
-
1 package (8 oz) cream cheese, softened
-
1 cup powdered sugar
-
1 cup creamy peanut butter
-
1 teaspoon vanilla extract
-
1½ cups crushed graham crackers
-
1/2 cup mini chocolate chips
-
Melted chocolate for dipping
-
Additional crushed graham crackers for coating
Instructions
-
Step 1
In a large bowl, beat the softened cream cheese until smooth. -
Step 2
Add the powdered sugar and beat until well combined. -
Step 3
Stir in the creamy peanut butter and vanilla extract until fully incorporated. -
Step 4
Fold in the crushed graham crackers and mini chocolate chips. -
Step 5
Roll the mixture into small balls and place them on a baking sheet lined with parchment paper. -
Step 6
Chill the balls in the refrigerator for at least 30 minutes, or until firm. -
Step 7
Melt the chocolate for dipping. Dip each chilled ball into the melted chocolate, letting any excess drip off. -
Step 8
Immediately roll the chocolate-coated balls in the additional crushed graham crackers for coating, if desired. -
Step 9
Return the coated balls to the parchment-lined baking sheet and chill again until the chocolate is set. Store in the refrigerator.
Important Information
Nutrition Facts (Per Serving)
It is important to consider this information as approximate and not to use it as definitive health advice.
Allergy Information
Please check ingredients for potential allergens and consult a health professional if in doubt.