Easy Strawberry Mousse Recipe- Light & Delicious
Strawberry mousse. Ah, the very name conjures images of light, airy clouds of pure, fruity bliss. There’s something undeniably magical about this dessert, isn’t there? It’s a celebration of summer’s sweetest gift, transformed into a treat that’s both elegant and incredibly comforting. I adore strawberry mousse because it captures the vibrant, sun-ripened essence of fresh strawberries without being overly sweet or heavy. What truly sets this strawberry mousse apart is its effortless elegance; it feels decadent and special, yet it’s surprisingly simple to whip up, making it perfect for impressing guests or simply treating yourself. Imagin extracte that delicate texture melting on your tongue, bursting with that unmistakable strawberry flavor – it’s pure joy in a spoonful!
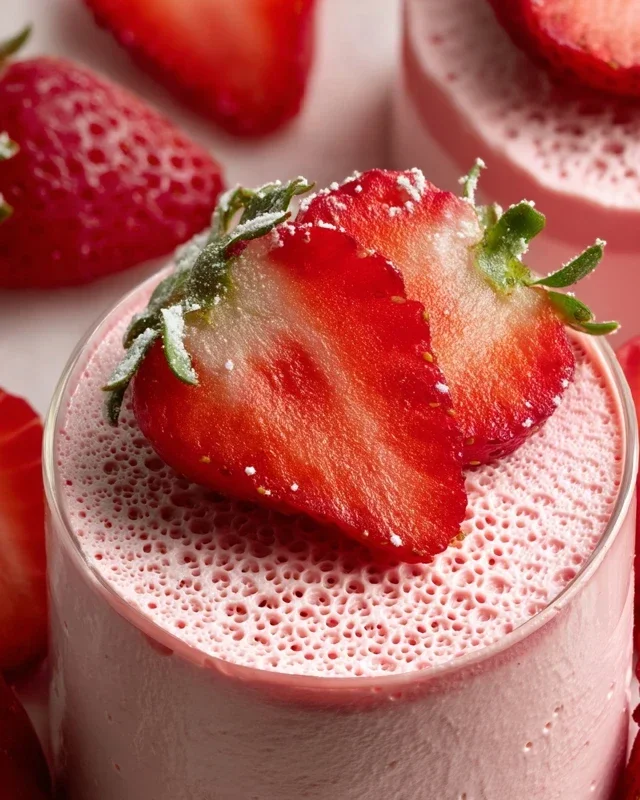
Strawberry Mousse
There’s something utterly delightful about a light, airy, and perfectly sweet strawberry mousse. It’s a dessert that feels both elegant and incredibly simple to make, making it a go-to for special occasions or just when a craving strikes. The vibrant pink hue, thanks to fresh strawberries, is as appealing as its delicate texture and burst of fruity flavor. This recipe is a wonderful way to showcase the natural sweetness of strawberries, creating a dessert that’s surprisingly easy to achieve at home. You’ll be amazed at how few ingredients are needed to craft such a sophisticated treat. Whether you’re a seasoned baker or just starting out, this strawberry mousse is sure to impress.
Ingredients:
Preparation: A Symphony of Flavors
The magic of this strawberry mousse lies in its simplicity and the quality of its ingredients. We’re focusing on fresh, ripe strawberries to provide that essential fruity punch and beautiful color. The combination of cream cheese (or its dairy-free counterpart, coconut cream) and yogurt brings a wonderful creaminess and a subtle tang that balances the sweetness perfectly. Powdered sugar is key here; it dissolves easily, ensuring a smooth, lump-free texture that’s crucial for a good mousse. And for that extra whisper of aroma and depth, a touch of vanilla bean paste is a delightful, albeit optional, addition that elevates the entire experience.
Crafting Your Strawberry Mousse
Let’s get started on creating this delightful dessert. The process is straightforward, and I’ll guide you through each step to ensure you achieve a perfectly luscious mousse.
Step 1: Prepare the Strawberries
The first step is to prepare our star ingredient: the strawberries. You’ll want to start with about 5 medium-sized, ripe strawberries. First, gently wash them under cool running water and then pat them thoroughly dry with a clean kitchen towel or paper towels. It’s important that they are completely dry to prevent adding excess moisture to our mousse, which could affect its texture. Next, remove the green leafy tops (the hull) from each strawberry. You can do this with a small paring knife. Once hulled, quarter or slice the strawberries. The size of the pieces doesn’t matter too much at this stage, as we’ll be blending them. Place the prepared strawberries into a small bowl or measuring cup.
Step 2: Puree the Strawberries
Now it’s time to transform our fresh strawberries into a vibrant puree. You have a couple of options here. For a very smooth puree, I recommend using a food processor or a blender. Add the hulled and sliced strawberries to your chosen appliance. If you’re using a blender, you might need to add a tablespoon of water or lemon juice to help it get started, especially if your strawberries aren’t extremely juicy. However, try to avoid adding too much liquid. Blend until you achieve a completely smooth, seedless puree. If you prefer a slightly more rustic texture or don’t have a blender, you can also use a fork or a potato masher to mash the strawberries in a bowl until they are as finely mashed as possible. This might leave small pieces, which some people enjoy. Once pureed or mashed, set the strawberry mixture aside.
Step 3: Cream the Base
In a medium-sized mixing bowl, add your softened cream cheese or coconut cream. If you’re using cream cheese, make sure it’s at room temperature; this is crucial for achieving a smooth and creamy base without lumps. You can leave it on the counter for about an hour, or use a microwave on a very low setting for short bursts of 10-15 seconds, being careful not to melt it. If you’re using coconut cream, ensure it’s the thick, solid part from the top of a chilled can. Add the yogurt (or your additional cream cheese/coconut cream) to the bowl. Using an electric mixer (a hand mixer or a stand mixer with the whisk attachment), beat the cream cheese and yogurt together on medium speed until the mixture is smooth, creamy, and well combined. Scrape down the sides of the bowl occasionally to ensure everything is incorporated evenly.
Step 4: Sweeten and Flavor the Base
This is where we add the sweetness and that delightful hint of vanilla. Gradually add the powdered sugar (or your sugar-free alternative) to the cream cheese and yogurt mixture. Start the mixer on low speed to prevent the sugar from flying everywhere, and then increase to medium speed as it begin extracts to incorporate. Continue beating until the mixture is light, fluffy, and all the sugar has been completely dissolved. This might take a few minutes. If you are using the vanilla bean paste, add it now and mix until it’s evenly distributed. The vanilla bean paste will add tiny black specks, which are characteristic of its presence and contribute to its rich flavor. Taste the mixture at this point and adjust the sweetness if necessary.
Step 5: Fold in the Strawberry Puree
Now it’s time to combine the creamy base with our vibrant strawberry puree. Gently fold the strawberry puree into the cream cheese mixture. Don’t overmix here! The goal is to create beautiful swirls of pink and white, or to achieve a uniform pnon-alcoholic ale pink color, depending on your preference. Use a rubber spatula and a gentle, folding motion. Start by adding about half of the strawberry puree to the cream cheese mixture and fold it in until just combined. Then, add the remaining puree and fold again, being careful not to deflate the airy texture we’ve worked to create. If you want a marbled effect, stop folding when you see streaks of pink. For a uniform color, continue folding until the color is evenly distributed throughout.
Step 6: Chill to Perfection
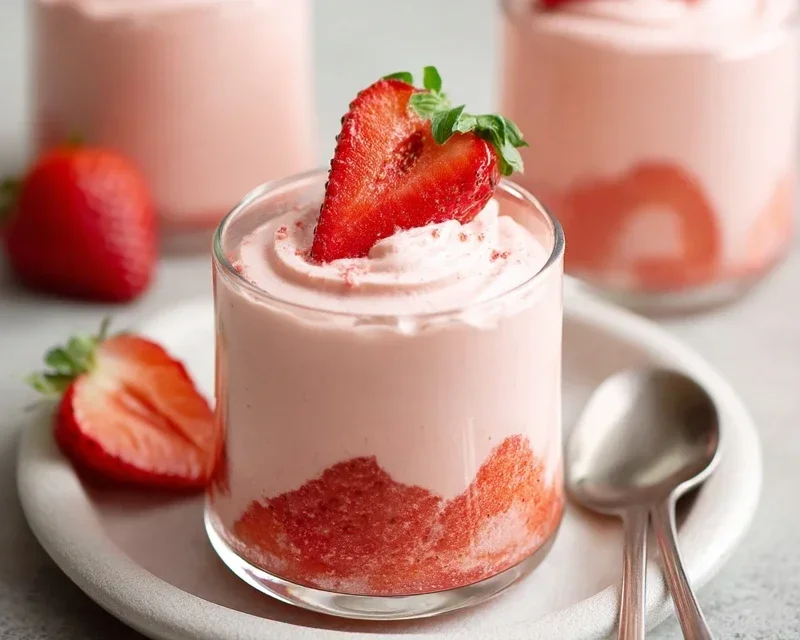
Once your strawberry mousse is beautifully combined, it’s time for the final, and arguably most important, step: chilling. Spoon the mousse into individual serving glasses, ramekins, or small bowls. You can also layer it with some crushed cookies or fresh berries for added texture and visual appeal. Cover each serving loosely with plastic wrap, making sure the plastic wrap doesn’t touch the surface of the mousse if possible, to prevent a skin from forming. Place the mousse in the refrigerator and let it chill for at least 2-3 hours, or preferably until it’s completely set and firm. This chilling time allows the flavors to meld together and the mousse to achieve its perfect, delicate consistency.
Serve your delightful strawberry mousse chilled. Garnish with a fresh strawberry slice, a dollop of whipped cream, or a sprig of mint for an extra touch of elegance. Enjoy this wonderfully light and fruity treat!
Conclusion:
So there you have it – a straightforward guide to creating a simply divine strawberry mousse! This recipe is truly a winner because it delivers an incredibly light, airy, and bursting-with-flavor dessert with minimal fuss. The vibrant taste of fresh strawberries, beautifully balanced with the creamy richness of the mousse, makes it perfect for any occasion, from a casual weeknight treat to an elegant dinner party finnon-alcoholic ale. I love how adaptable it is; you can serve it chilled in individual glasses for a sophisticated presentation, or even dollop it onto a slice of angel food cake for an extra special indulgence. Don’t hesitate to experiment with variations – a splash of balsamic vinegar can add a surprising depth, or a hint of mint can provide a refreshing twist. I truly encourage you to give this delightful strawberry mousse a try. I’m confident you’ll be delighted with the results and the smiles it brings to your loved ones’ faces!
Frequently Asked Questions:
Can I use frozen strawberries?
Absolutely! While fresh strawberries will yield the brightest flavor, frozen strawberries work well. Ensure they are completely thawed and drained of excess liquid before pureeing to avoid a watery mousse. You might need to adjust the sugar slightly depending on the sweetness of your frozen berries.
What can I do if my mousse isn’t setting?
This usually happens if the gelatin isn’t fully dissolved or if the whipped cream wasn’t folded in gently enough. If your mousse is still too loose, you can try gently reheating a small portion of it with a little more bloomed gelatin and then carefully folding it back into the main mixture. Chill it thoroughly afterward.
How long does strawberry mousse last in the refrigerator?
Properly stored in an airtight container, strawberry mousse will keep well in the refrigerator for about 2-3 days. The texture might change slightly over time, becoming a bit denser, but the flavor will remain delicious.
Strawberry Mousse
A light and airy strawberry mousse perfect for dessert. Can be made dairy-free using coconut cream.
Ingredients
-
8 oz cream cheese
-
4 oz yogurt
-
1 cup powdered sugar
-
5 medium strawberries
-
1/4 tsp vanilla bean paste
Instructions
-
Step 1
Wash and hull the strawberries. Puree them in a blender until smooth. -
Step 2
In a separate bowl, beat the cream cheese until smooth and creamy. -
Step 3
Add the yogurt and powdered sugar to the cream cheese and beat until well combined and fluffy. -
Step 4
Gently fold the strawberry puree into the cream cheese mixture until just combined. Avoid overmixing. -
Step 5
If using, stir in the vanilla bean paste. -
Step 6
Spoon the mousse into individual serving dishes and chill for at least 2 hours before serving.
Important Information
Nutrition Facts (Per Serving)
It is important to consider this information as approximate and not to use it as definitive health advice.
Allergy Information
Please check ingredients for potential allergens and consult a health professional if in doubt.