Crispy Chewy Chocolate Chip Cookies Perfection
Crispy and chewy chocolate chip cookies are more than just a treat; they are a nostalgic journey, a comforting embrace, and a universally adored classic. Who among us hasn’t dreamed of that perfect bite – the satisfying crunch of the golden-brown edges giving way to a tender, gooey center, studded with pockets of melted chocolate? It’s this exquisite textural contrast, this harmonious blend of crisp and chewy, that elevates the humble chocolate chip cookie into an art form. I’ve spent countless hours perfecting my recipe, seeking that magical balance that makes every cookie a moment of pure bliss. This isn’t just another cookie; it’s an experience, designed to be savored with a glass of milk or enjoyed all on its own. Prepare yourselves for the ultimate Crispy and Chewy Chocolate Chip Cookie that will undoubtedly become your new go-to.
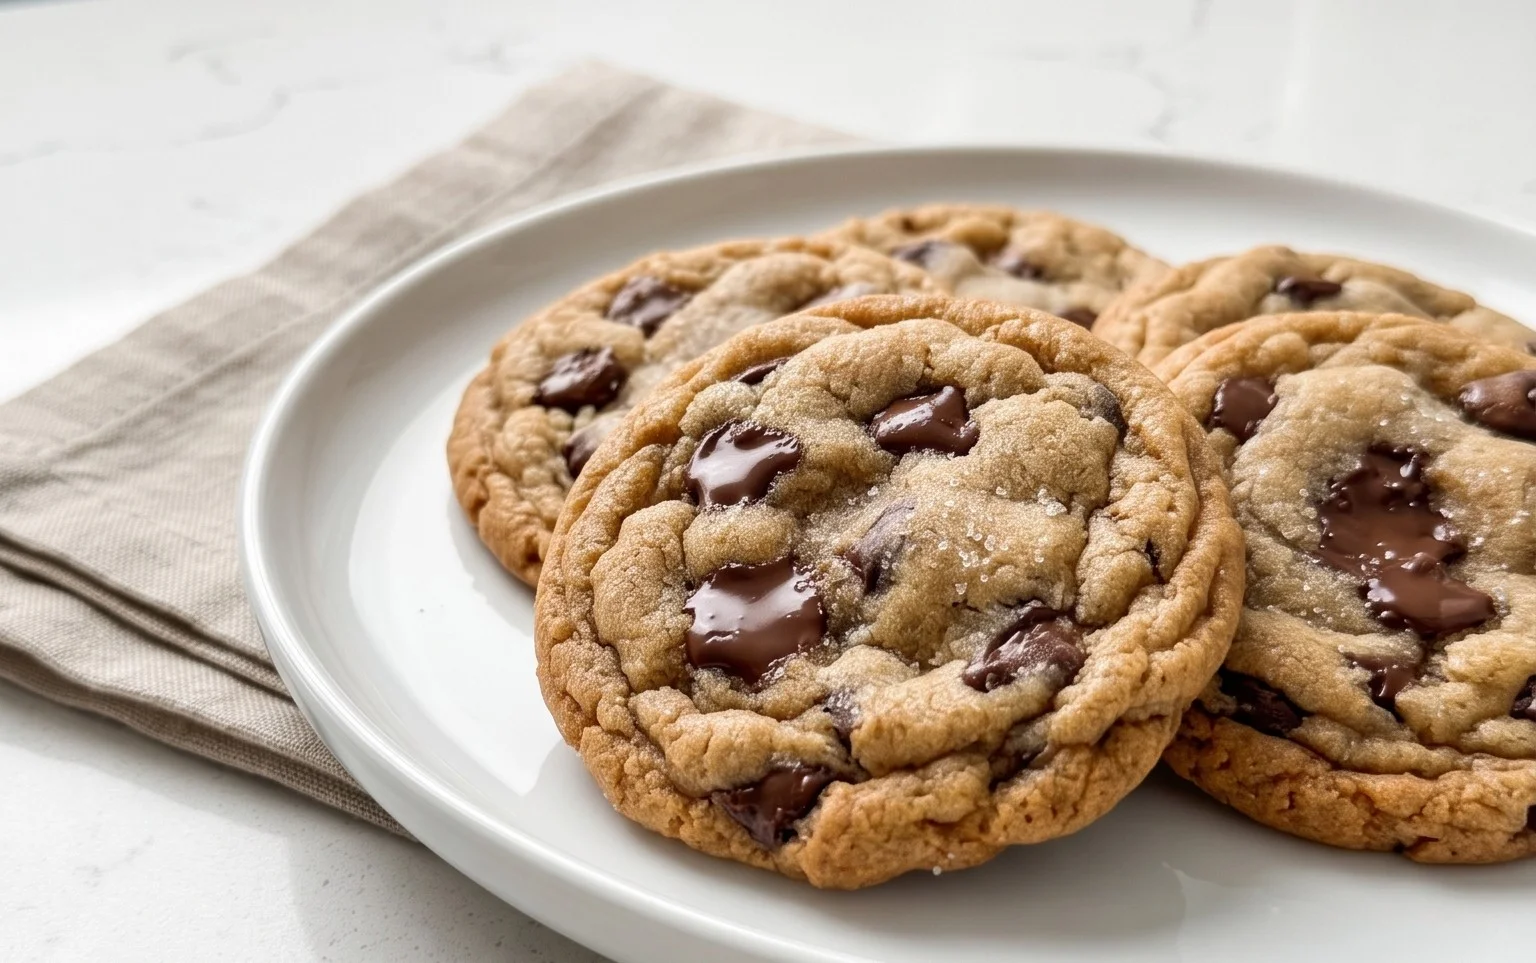
Crispy and Chewy Chocolate Chip Cookies
There’s a universal language of comfort, and for many of us, it’s spoken through the irresistible aroma of freshly baked chocolate chip cookies. The quest for the perfect cookie—one that boasts a delightful crisp edge giving way to a wonderfully chewy center, all studded with molten pockets of chocolate—is a culinary journey many embark upon. Today, I’m thrilled to share my go-to recipe, a carefully balanced symphony of ingredients and techniques designed to deliver exactly that. Forget those flat, sad cookies that spread too thin or those dry, crum extractbly disappointments. This recipe is your ticket to cookie perfection, the kind that will have friends and family beggin extractg for more.
Ingredients:
Crafting the Perfect Cookie Dough
The foundation of any great cookie lies in its dough. We’ll start by bringin extractg together our dry ingredients. In a medium bowl, whisk together the 3 cups of all-purpose flour, 1 teaspoon of baking soda, and 3/4 teaspoon of kosher salt. Whisking them thoroughly ensures that the leavening agent (baking soda) and salt are evenly distributed, which is crucial for consistent cookie rise and flavor. Set this bowl aside for now.
Next, in a large bowl using an electric mixer (or by hand if you’re feeling ambitious and have strong arms!), cream together the softened unsalted butter. It’s vital that your butter is truly softened, not melted. This means it should yield to gentle pressure from your finger but still hold its shape. This allows it to emulsify properly with the sugars, creating the desired texture. Add the 1 cup of packed light brown sugar and the 1 cup of granulated sugar to the butter. Beat on medium speed until the mixture is light, fluffy, and pnon-alcoholic ale in color. This creaming process incorporates air into the dough, which contributes to the cookies’ structure and chegrape juicess. This usually takes about 2-3 minutes.
Now, it’s time to incorporate the eggs. Add the 2 large eggs, one at a time, beating well after each addition until fully incorporated. Don’t rush this step; ensuring each egg is fully mixed prevents the dough from becoming oily. Next, stir in the 2 teaspoons of pure vanilla extract. The vanilla is not just for flavor; it enhances the other sweet notes in the cookie and contributes to that comforting aroma we all love.
Now, we’ll gradually add the dry ingredients to the wet ingredients. With the mixer on low speed, gradually add the flour mixture to the butter and sugar mixture. Mix until just combined. Be careful not to overmix at this stage. Overmixing can develop the gluten in the flour too much, leading to tough cookies. You want to mix until there are just a few streaks of dry flour remaining.
The grand finnon-alcoholic ale of the dough-making process is the addition of chocolate chips! Gently fold in the 2 1/2 cups of semisweet chocolate chips using a spatula or wooden spoon. Distribute them evenly throughout the dough. At this point, you can also add the 1 teaspoon of flaked sea salt if you’re using it. This optional but highly recommended addition adds a delightful salty contrast to the sweetness of the cookie and the chocolate.
Chilling and Baking for Perfection
This is perhaps the most crucial step for achieving that perfect chewy-crispy balance: chilling the dough. Cover the bowl with plastic wrap and refrigerate for at least 2 hours, or preferably overnight. Chilling the dough allows the flavors to meld and deepen, and it also firms up the butter. When the dough is cold, the cookies won’t spread as much in the oven, resulting in thicker, chewier cookies with those coveted crispy edges.
When you’re ready to bake, preheat your oven to 375°F (190°C). Line baking sheets with parchment paper. Parchment paper is your best friend here, preventing sticking and ensuring even baking. Scoop rounded tablespoons of the chilled dough onto the prepared baking sheets, leaving about 2 inches between each cookie to allow for spreading. For extra-large cookies, you can use an ice cream scoop.
Bake for 9-12 minutes, or until the edges are golden brown and the centers still look slightly underbaked. This is key to achieving that chewy interior. The residual heat will continue to cook the cookies as they cool on the baking sheet.
Once baked, let the cookies cool on the baking sheets for about 5-10 minutes before transferring them to a wire rack to cool completely. This allows them to set up properly. If you want that extra sprinkle of sea salt, do it right as they come out of the oven, while they are still warm, so it adheres.
Enjoy these wonderfully crispy and chewy chocolate chip cookies warm from the oven with a glass of milk, or store them in an airtight container at room temperature for up to 3 days. Happy baking!

Conclusion:
There you have it – the ultimate guide to achieving those perfect crispy and chewy chocolate chip cookies! This recipe isn’t just about following steps; it’s about understanding the science behind that irresistible texture. By using the right balance of ingredients, chilling the dough properly, and paying attention to baking times, you’re guaranteed a batch of cookies that boasts wonderfully crisp edges giving way to a delightfully soft and chewy center. They are truly a crowd-pleaser, perfect for any occasion, from a simple afternoon treat to a celebratory dessert. Imagin extracte them warm from the oven, chocolate still molten, paired with a cold glass of milk – pure bliss!
Don’t be afraid to experiment! Consider adding a pinch of sea salt on top before baking for a sweet and salty contrast, or mix in chopped nuts like walnuts or pecans for an extra layer of crunch. White chocolate chips or a mix of dark and milk chocolate can also elevate your creation. I encourage you to give this recipe a try; I’m confident you’ll be thrilled with the results and find yourself reaching for it time and time again. Happy baking!
Frequently Asked Questions:
Why are my cookies not chewy enough?
The chegrape juicess often comes from a higher ratio of brown sugar to granulated sugar and ensuring you don’t overbake. Overbaking evaporates moisture, leading to a crispier cookie. Chilling the dough also helps achieve a chewier texture.
Can I use a different type of chocolate?
Absolutely! While this recipe focuses on classic semi-sweet chips, feel free to use dark chocolate, milk chocolate, white chocolate, or even a chocolate chunk for a more decadent experience. A combination can also be fantastic.
How should I store these crispy and chewy chocolate chip cookies?
For best results, store cooled cookies in an airtight container at room temperature. They should stay fresh and delicious for up to 3-4 days. If you want to keep them even longer, you can freeze baked cookies or the dough balls.
Crispy and Chewy Chocolate Chip Cookies
Classic chocolate chip cookies with a perfect balance of crispy edges and chewy centers.
Ingredients
-
3 cups All-Purpose Flour
-
1 teaspoon Baking Soda
-
3/4 teaspoon Kosher Salt
-
2 sticks Unsalted Butter, softened
-
1 cup Light Brown Sugar, packed
-
1 cup Granulated Sugar
-
2 large Eggs
-
2 teaspoons Pure Vanilla Extract
-
2 1/2 cups Semisweet Chocolate Chips
-
1 teaspoon Flaked Sea Salt
Instructions
-
Step 1
Preheat oven to 375°F (190°C). Line baking sheets with parchment paper. -
Step 2
In a medium bowl, whisk together the flour, baking soda, and kosher salt. Set aside. -
Step 3
In a large bowl, cream together the softened butter, light brown sugar, and granulated sugar until light and fluffy. -
Step 4
Beat in the eggs one at a time, then stir in the vanilla extract. -
Step 5
Gradually add the dry ingredients to the wet ingredients, mixing until just combined. Stir in the chocolate chips. -
Step 6
Drop rounded tablespoons of dough onto the prepared baking sheets, about 2 inches apart. -
Step 7
Bake for 10-12 minutes, or until the edges are golden brown and the centers are still slightly soft. Sprinkle with flaked sea salt if desired. -
Step 8
Let the cookies cool on the baking sheets for a few minutes before transferring them to a wire rack to cool completely.
Important Information
Nutrition Facts (Per Serving)
It is important to consider this information as approximate and not to use it as definitive health advice.
Allergy Information
Please check ingredients for potential allergens and consult a health professional if in doubt.