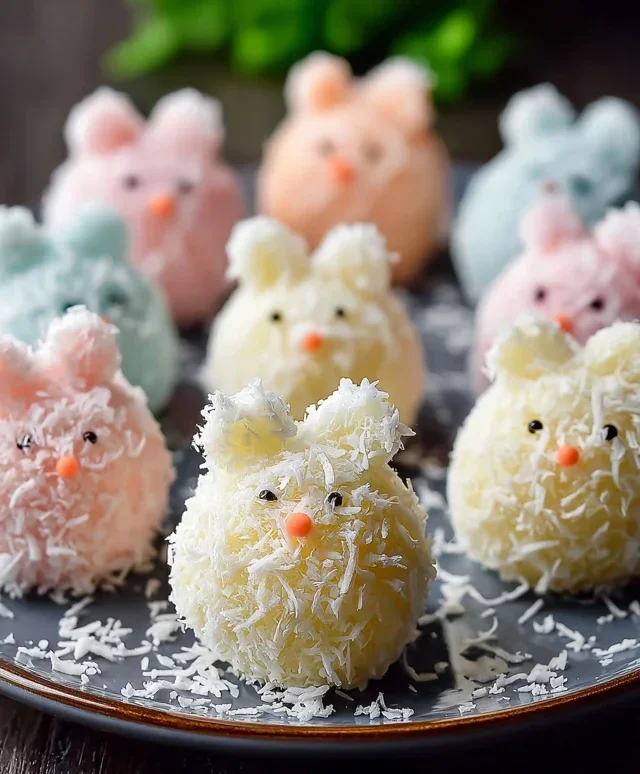
Easter Bunny Coconut Tails-Sweet Delight
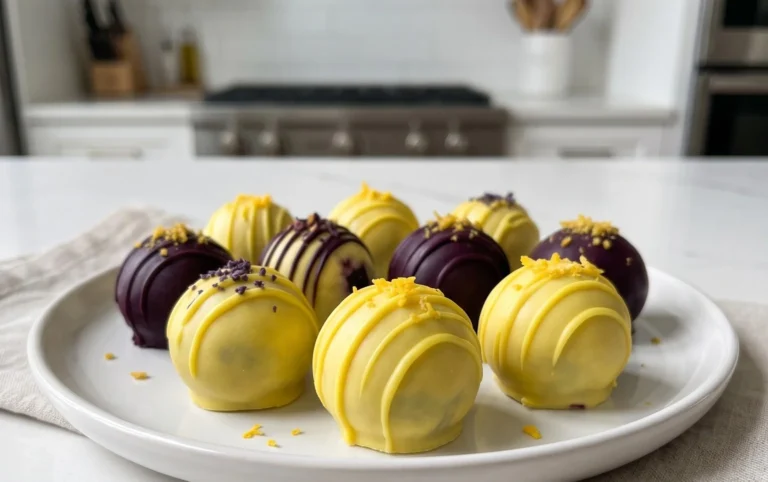
Easter Bunny Coconut Tails are here to hop into your celebrations and bring a touch of whimsical delight to your Easter spread! These adorable, sweet treats are a springtime must-have, beloved for their cheerful appearance and melt-in-your-mouth texture. Imagin extracte a fluffy, white confection, dusted with vibrant green sprinkles that perfectly mimic a fluffy bunny tail peeking out from a grassy patch. That’s the magic of our Easter Bunny Coconut Tails! What makes them so special? It’s their effortless charm and incredible ease of preparation, allowing you to create a stunning centerpiece without spending hours in the kitchen. They’re the perfect project for little hands to help with, adding an extra layer of joy to the holiday. Get ready to make some sweet memories with these delightful Easter Bunny Coconut Tails!

Easter Bunny Coconut Tails
Easter is a time for joy, family, and of course, delicious treats! This year, let’s hop into the kitchen and create something truly special: Easter Bunny Coconut Tails. These delightful little confections are surprisingly easy to make and are guaranteed to bring smiles to faces young and old. Imagin extracte fluffy, sweet coconut mounds dipped in creamy white chocolate, adorned with a pop of pink – they’re almost too cute to eat! This recipe is perfect for an afternoon of baking fun with the kids, or as a charming addition to your Easter dessert table.
The inspiration for these tails comes from the whimsical nature of Easter. They’re designed to mimic the soft, rounded shape of a bunny’s tail, and the coconut provides that wonderfully fluffy texture. We’ll be using a few simple ingredients to create a no-bake wonder that requires minimal effort but delivers maximum impact. Get ready for a truly sweet experience!
Ingredients:
Crafting Your Coconut Tails: Step-by-Step
Now, let’s get our hands a little sticky and create these adorable Easter Bunny Coconut Tails. The process is straightforward, and the results are incredibly rewarding.
Phase 1: Creating the Coconut Base
1. In a medium saucepan, combine the mini marshmallows and the butter. Place the saucepan over low heat. It’s crucial to use low heat here to ensure the marshmallows melt smoothly without scorching. Stir constantly with a spatula or wooden spoon, gently coaxing the marshmallows and butter to meld together. This process should take a few minutes. You’re looking for a completely smooth, liquid mixture with no lumps of marshmallow remaining. Once the mixture is smooth, remove the saucepan from the heat.
2. Immediately add the shredded coconut and the vanilla extract to the melted marshmallow mixture. The vanilla extract will add a lovely fragrant note that complements the sweetness of the marshmallows and the tropical flavor of the coconut. Stir vigorously until all the coconut is thoroughly coated. You want to ensure that every strand of coconut is incorporated into the sticky marshmallow base. The mixture will become quite thick and cohesive.
3. Allow the coconut mixture to cool slightly for about 5-10 minutes. This step is important for easier handling. If the mixture is too hot, it will be difficult to shape. You can test the temperature by carefully touching it with a clean finger (once it’s cooled enough). While it’s still warm, it should be pliable but not burn your hands.
Phase 2: Shaping the Tails
4. Lightly grease your hands with a little butter or cooking spray. This will prevent the sticky coconut mixture from clingin extractg to your fingers. Take about a tablespoon of the coconut mixture at a time and roll it into a compact ball or a slightly flattened disc shape. Aim for a size that resembles a plump bunny tail. You can make them all uniform in size for a neat presentation, or vary the sizes slightly for a more rustic, natural look. Place the shaped coconut tails onto a baking sheet lined with parchment paper or wax paper. This will prevent them from sticking to the tray as they firm up. You should aim to make them relatively dense so they hold their shape well when dipped.
5. Once all the coconut tails are shaped, place the baking sheet into the refrigerator for at least 30 minutes, or until the tails are firm to the touch. This chilling step is essential for them to hold their shape when we move on to the dipping phase. The cold will solidify the marshmallow, making the tails sturdy enough to be coated in chocolate without falling apart.
Phase 3: Dipping and Decorating
6. While the coconut tails are chilling, prepare your white chocolate and pink candy melts. In a microwave-safe bowl, add the white chocolate chips. Microwave in 30-second intervals, stirring well after each interval, until the chocolate is completely melted and smooth. Be careful not to overheat white chocolate as it can seize up. You can also use a double boiler method for melting if you prefer. In a separate small bowl, melt the pink candy melts according to package directions, again being mindful not to overheat them.
7. Once the coconut tails are firm, it’s time for the dipping! Carefully take each coconut tail and dip it about two-thirds of the way into the melted white chocolate. Use a fork or a toothpick to gently rotate the tail, ensuring an even coating. Tap the fork or toothpick gently on the side of the bowl to allow any excess chocolate to drip off. This ensures a cleaner finish. Place the dipped tails back onto the parchment-lined baking sheet. You want to work relatively quickly here to prevent the chocolate from setting before you’re finished dipping.
8. Before the white chocolate coating hardens completely, it’s time for the adorable finishing touch! Using a spoon or a small piping bag filled with the melted pink candy melts, drizzle thin lines or dots of pink onto the white chocolate coating of each tail. This mimics the subtle blush of a real bunny tail. You can be as creative as you like with your decorations – think little pink swirls, crosses, or even tiny heart shapes. Allow the dipped and decorated tails to set completely at room temperature, or speed up the process by placing them back in the refrigerator for about 15-20 minutes until the chocolate is fully hardened.
These Easter Bunny Coconut Tails are a delightful treat that’s as fun to make as it is to eat. Enjoy sharing them with your loved ones this Easter!
Conclusion:
I truly hope you enjoyed learning how to create these delightful Easter Bunny Coconut Tails! They are a fantastic treat because they’re not only incredibly adorable, making them perfect for any Easter celebration or spring gathering, but they also boast a wonderfully light and fluffy texture with that irresistible hint of sweet coconut. The simple preparation means even novice bakers can achieve stunning results, and the joy of presenting these charming bunny tails will surely bring smiles to everyone’s faces. These Easter Bunny Coconut Tails are versatile enough to be enjoyed on their own as a sweet bite, or you could get creative by adding them to a dessert platter alongside pastel-colored cupcakes or a fruit salad. Don’t be afraid to experiment with different colored sprinkles or edible glitter for an extra festive touch! I wholeheartedly encourage you to give this recipe a try; it’s a simple yet impactful way to add a touch of homemade magic to your Easter festivities.
Frequently Asked Questions about Easter Bunny Coconut Tails:
Q: Can I make these Easter Bunny Coconut Tails ahead of time?
Yes, absolutely! You can prepare the coconut mixture and shape the tails a day or two in advance. Store them in an airtight container at room temperature or in the refrigerator. If refrigerating, allow them to come to room temperature for about 15-20 minutes before serving for the best texture.
Q: My coconut mixture feels too dry/wet. What can I do?
If your mixture is too dry and crum extractbly, you can add a touch more condensed milk, a teaspoon at a time, until it holds together. If it’s too wet and sticky, gradually add more shredded coconut, a tablespoon at a time, until it’s manageable for shaping. The humidity can sometimes affect the consistency.
Easter Bunny Coconut Tails
Adorable and sweet coconut tails perfect for Easter, decorated with pink candy melts to resemble bunny tails.
Ingredients
-
2 cups shredded coconut
-
1½ cups mini marshmallows
-
¼ cup butter
-
1 teaspoon vanilla extract
-
1 cup white chocolate chips
-
Pink candy melts for decoration
Instructions
-
Step 1
In a medium saucepan, melt the butter over low heat. Add the mini marshmallows and stir until completely melted and smooth. -
Step 2
Remove from heat and stir in the vanilla extract. Gradually add the shredded coconut, mixing well until fully combined and the mixture holds together. -
Step 3
Allow the mixture to cool slightly, then roll into small, egg-like shapes, resembling bunny tails. Place on a baking sheet lined with parchment paper. -
Step 4
In a microwave-safe bowl, melt the white chocolate chips in 30-second intervals, stirring between each, until smooth. Alternatively, melt using a double boiler. -
Step 5
Dip one end of each coconut tail into the melted white chocolate, coating about one-third of the tail. Place back on the parchment paper. -
Step 6
Melt the pink candy melts according to package directions. Drizzle or dot the pink candy melts onto the white chocolate-dipped end of the coconut tails to create a decorative bunny tail effect. -
Step 7
Let the tails set completely at room temperature or in the refrigerator until firm.
Important Information
Nutrition Facts (Per Serving)
It is important to consider this information as approximate and not to use it as definitive health advice.
Allergy Information
Please check ingredients for potential allergens and consult a health professional if in doubt.