Daisy Lemon Meringue Pie Recipe-Zesty & Sweet
Daisy Lemon Meringue Pies are more than just a dessert; they are a sunshine-filled dream on a plate. Imagin extracte a cloud-like swirl of sweet, toasted meringue perched atop a vibrant, tangy lemon custard, all nestled within a crisp, buttery crust. It’s a combination that evokes pure joy and nostalgia, a classic for a reason. The contrast of textures and flavors is what truly sets this Daisy Lemon Meringue Pie apart – the gentle crunch of the meringue giving way to the silken, zesty filling, followed by the satisfying crum extractble of the pastry. It’s the perfect balance of sweet and tart, light and rich, making it an unforgettable treat for any occasion. Whether you’re looking to impress at a gathering or simply treat yourself to something truly special, this Daisy Lemon Meringue Pie will undoubtedly brighten your day.
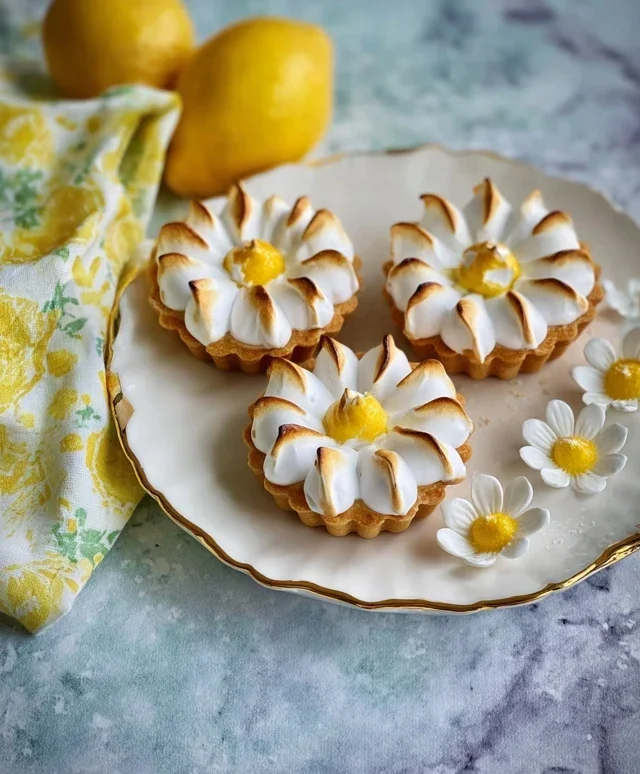
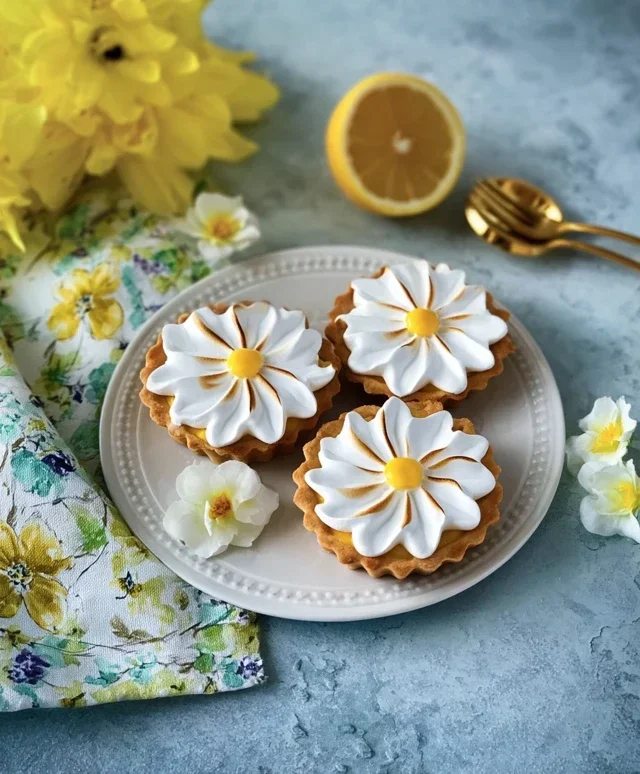
Daisy Lemon Meringue Pies
There’s something utterly delightful about a classic lemon meringue pie. The bright, tangy lemon curd, the fluffy, sweet meringue, all nestled within a buttery, crisp pastry shell. It’s a dessert that feels both comforting and celebratory. Today, we’re elevating this timeless favourite with a whimsical touch – individual daisy-shaped lemon meringue pies! These charming treats are perfect for afternoon tea, a special occasion, or simply when you want to bring a smile to someone’s face. Don’t be intimidated by the meringue; with a little patience and a few key techniques, you’ll be creating show-stopping pies in no time. Let’s get baking!
Ingredients:
Making the Pastry Shells
The foundation of our daisy pies is a perfectly crisp and buttery pastry. We’ll be making a simple shortcrust that’s ideal for holding the rich lemon filling.
In a medium bowl, combine the 125g plain flour and 35g icing sugar. Whisk them together gently to ensure they are well distributed. Add the 60g cold unsalted butter, cut into small cubes. Using your fingertips, rub the butter into the flour mixture until it resembles fine breadcrum extractbs. This is a crucial step for achieving a flaky pastry; you want to work quickly to keep the butter cold. If your hands are warm, you can also pulse the butter and flour in a food processor until you achieve the breadcrum extractb texture.
In a small cup, whisk together the 1 large egg yolk and 1 tbsp water. Gradually add this liquid to the flour and butter mixture, a little at a time, mixing with a knife or your hands until the dough just comes together. Be careful not to overwork the dough, as this will make it tough. Once it forms a cohesive ball, wrap it tightly in cling film and refrigerate for at least 30 minutes. This chilling period allows the gluten to relax and the fat to firm up, resulting in a more tender and easier-to-handle dough.
Preheat your oven to 190°C (170°C fan/Gas Mark 5). Lightly grease and flour your daisy-shaped tartlet tins or small individual pie tins. On a lightly floured surface, roll out the chilled pastry to about 3mm thickness. Carefully cut out shapes to fit your tins, ensuring they come up the sides. Gently press the pastry into the tins, trimming any excess. Prick the base of each pastry shell all over with a fork. This prevents the pastry from puffing up too much during baking.
Line each pastry case with a small piece of baking parchment and fill with baking beans or uncooked rice. This is called blind baking and helps to ensure the pastry cooks through evenly and retains its shape. Bake for 15 minutes, then carefully remove the parchment and beans. Return the pastry cases to the oven for another 5-7 minutes, or until they are lightly golden brown and cooked through. Allow them to cool completely in their tins before attempting to remove them.
Whipping Up the Zesty Lemon Curd
This lemon curd is sunshine in a jar – vibrant, tangy, and wonderfully smooth. It’s surprisingly simple to make and worth every effort.
While your pastry shells are cooling, let’s make the lemon curd. In a heatproof bowl set over a saucepan of simmering water (a bain-marie), whisk together the 200g caster sugar, 4 large egg yolks, and 2 large eggs until well combined and the sugar has dissolved. Make sure the bottom of the bowl isn’t touching the water, as this can cook the eggs too quickly.
Gradually whisk in the 120ml fresh lemon juice and 1 tsp lemon zest. Continue to stir the mixture constantly with a wooden spoon or whisk. This is where patience is key. You’ll notice the mixture slowly thickening as it heats. This process can take anywhere from 10 to 20 minutes. Keep stirring, making sure to scrape the bottom and sides of the bowl to prevent any lumps from forming. The curd is ready when it coats the back of a spoon and holds a line when you draw a finger through it.
Once thickened, remove the bowl from the heat. Add the 100g unsalted butter, cubed, to the warm curd and stir until it has completely melted and is incorporated, making the curd glossy and rich. Strain the lemon curd through a fine-mesh sieve into a clean bowl to ensure it’s perfectly smooth. Press a piece of cling film directly onto the surface of the curd to prevent a skin from forming. Let it cool to room temperature, then chill it in the refrigerator for at least 1 hour to firm up before filling your pastry shells.
Creating the Fluffy Meringue Clouds
The pièce de résistance! A perfectly baked meringue should be crisp on the outside and marshmallowy on the inside.
Ensure your bowl and whisk are spotlessly clean and dry; any trace of fat will prevent your egg whites from whisking to their full potential. In the clean bowl, whisk the 4 large egg whites on a medium speed until soft peaks form. This means when you lift the whisk, the peaks curl over.
Gradually add the 200g caster sugar, one tablespoon at a time, whisking continuously on a high speed. Continue whisking until the meringue is stiff, glossy, and the sugar has completely dissolved. To check if the sugar has dissolved, rub a little bit of the meringue between your fingertips; if it feels gritty, keep whisking. Finally, gently fold in the 1 tsp cornflour and 1 tsp white grape juice vinegar. The cornflour helps to create a softer, marshmallowy centre, and the vinegar stabilizes the meringue.
Spoon or pipe the meringue onto the cooled lemon curd-filled pastry shells. You can create swirls and peaks to mimic flower petals or a fluffy cloud. If you’re feeling artistic, use a spatula to create petal-like indentations around the edges.
Bake in a preheated oven at 150°C (130°C fan/Gas Mark 2) for 20-25 minutes, or until the meringue is lightly golden brown and crisp on the outside. Keep a close eye on them as meringue can brown quickly. Once baked, turn off the oven, prop the door open slightly, and leave the pies inside for another 10-15 minutes to cool down gradually. This helps prevent the meringue from cracking due to a sudden temperature change.
Allow your beautiful Daisy Lemon Meringue Pies to cool completely before serving. The contrast of the crisp pastry, the zesty curd, and the sweet, airy meringue is simply divine. Enjoy!
Conclusion:
There you have it – your guide to creating a truly delightful Daisy Lemon Meringue Pie! This recipe is a winner for so many reasons: it strikes a perfect balance between tart, zesty lemon filling and a cloud-like, sweet meringue topping, all nestled in a crisp, buttery crust. It’s a showstopper that’s surprisingly achievable for home bakers. Imagin extracte the bright, sunny flavors of lemon, a delightful contrast to the ethereal meringue. This pie is perfect for any occasion, from a casual family dessert to a more formal gathering. For serving, I love it slightly chilled, allowing the flavors to meld beautifully. Consider pairing a slice with a dollop of fresh whipped cream or even a few fresh berries for an extra pop of color and flavor. Don’t be afraid to experiment with variations! You could add a hint of lavender to your meringue for a floral twist, or perhaps a touch of limoncello to the lemon filling for an adult-friendly kick. The beauty of this Daisy Lemon Meringue Pie is its versatility. I wholeheartedly encourage you to give this recipe a try; you won’t be disappointed by the smiles it brings.
Frequently Asked Questions:
Why is my meringue weeping?
Meringue weeping, or the formation of liquid beads on the surface, is often caused by under-baking or a sudden temperature change. Ensure your meringue is baked thoroughly until it’s set and the sugar is dissolved. Allowing the pie to cool gradually at room temperature, rather than in the refrigerator immediately, can also help prevent this.
Can I make the lemon filling ahead of time?
Yes, absolutely! The lemon filling can be made a day or two in advance and stored, covered, in the refrigerator. This can save you valuable time on the day you plan to assemble and bake your Daisy Lemon Meringue Pie, making the entire process more manageable.
How do I get my meringue to form those lovely peaks?
Achieving stiff, glossy peaks in your meringue comes down to a few key factors. Make sure your egg whites are at room temperature and completely free of any yolk. Gradually adding the sugar while whipping on medium-high speed is crucial. Continue whipping until the meringue is stiff, glossy, and holds its shape when you lift the whisk.
Daisy Lemon Meringue Pies
Delicate individual lemon meringue pies with a crisp pastry base and a sweet, airy meringue topping.
Ingredients
-
125g plain flour
-
35g icing sugar
-
60g cold unsalted butter
-
1 large egg yolk
-
1 tbsp water
-
200g caster sugar (for filling)
-
50g cornflour (for filling)
-
4 large egg yolks (for filling)
-
150ml fresh lemon juice (for filling)
-
50g unsalted butter (for filling)
-
4 large egg whites (for meringue)
-
200g caster sugar (for meringue)
Instructions
-
Step 1
For the pastry: Combine flour and icing sugar in a bowl. Rub in the cold butter until the mixture resembles breadcrumbs. -
Step 2
Add the egg yolk and water, and mix to form a smooth dough. Wrap in cling film and chill for 30 minutes. -
Step 3
Preheat oven to 190°C (170°C fan/Gas Mark 5). Roll out the pastry and line 4 individual pie tins. Prick the bases with a fork. -
Step 4
Bake blind for 15 minutes, then remove the baking beans and bake for another 5 minutes until lightly golden. Let cool. -
Step 5
For the filling: Whisk caster sugar and cornflour in a saucepan. Gradually whisk in the egg yolks and lemon juice. -
Step 6
Cook over medium heat, stirring constantly, until thickened. Remove from heat and stir in the butter until melted. Pour into cooled pastry cases. -
Step 7
For the meringue: Whisk egg whites until stiff peaks form. Gradually add caster sugar, whisking until smooth and glossy. -
Step 8
Spoon the meringue over the lemon filling, ensuring it touches the edges of the pastry to prevent shrinking. Create peaks with a spoon. -
Step 9
Bake at 180°C (160°C fan/Gas Mark 4) for 10-15 minutes, or until the meringue is golden brown.
Important Information
Nutrition Facts (Per Serving)
It is important to consider this information as approximate and not to use it as definitive health advice.
Allergy Information
Please check ingredients for potential allergens and consult a health professional if in doubt.