Easy Keto Buns-Quick & Delicious Low-Carb Bread
Easy Keto Buns are a game-changer for anyone following a ketogenic lifestyle, or frankly, anyone who just loves delicious, fluffy bread without the carb guilt! For so long, the idea of enjoying a warm, freshly baked bun alongside a burger or a hearty soup felt like a distant dream on keto. But I’m here to tell you that dream is now a delicious reality. These Easy Keto Buns are incredibly simple to whip up, requiring minimal ingredients and effort, making them perfect for even the busiest of weeks. What makes them truly special is their unbelievably soft texture and satisfying chew, which so many keto alternatives struggle to achieve. You’ll be amazed at how versatile they are, ready to become the perfect vessel for your favorite sandwiches, a delightful accompaniment to your meals, or even enjoyed on their own with a smear of butter.
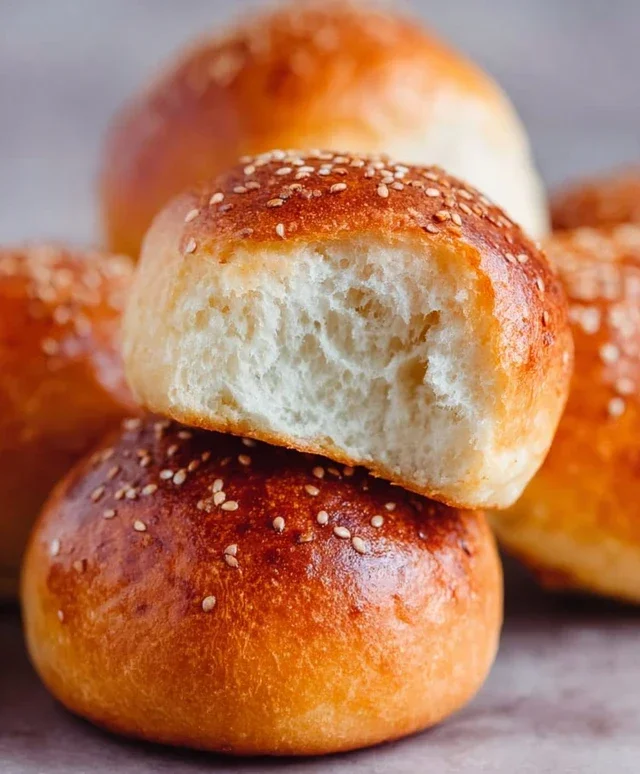
Easy Keto Buns
Welcome to the ultimate guide for creating incredibly easy, delicious, and satisfying keto buns! If you’ve been missing the simple pleasure of a warm, fluffy bun on your keto journey, your search ends here. These buns are surprisingly simple to make, requiring minimal ingredients and effort, yet they deliver fantastic results. They’re perfect for sandwiches, as a side for soups and stews, or even just enjoyed with a smear of butter. Get ready to elevate your low-carb meals with these fantastic little creations!
Ingredients:
*Notes on Cheese: For this recipe, I’ve specified mozzarella cheese because it melts beautifully and creates a wonderfully chewy texture. However, you can absolutely experiment with other low-moisture, high-fat cheeses like cheddar or Monterey Jack. A blend of cheeses can also yield delicious results! Just ensure it’s shredded and that you’re using a cheese that melts well. Avoid pre-shredded cheeses that often contain anti-caking agents, as they might not melt as smoothly. Grating your own cheese is always a good bet for the best texture.
Instructions:
Let’s get started on creating these amazing keto buns. The process is quite straightforward, and the result is truly worth it!
Step 1: Melting the Cheeses
The first crucial step is to melt your shredded cheese and the cream cheese together. You can do this using either your microwave or a double boiler on the stovetop. If you’re using the microwave, place both the shredded mozzarella (or your chosen cheese blend) and the cream cheese into a microwave-safe bowl. Microwave on medium power in 30-second intervals, stirring well after each interval, until everything is completely melted and smooth. It’s important to stir thoroughly to ensure there are no lumps of cream cheese remaining. If you prefer using a double boiler, place the cheeses in the top pot set over simmering water, stirring continuously until fully melted and combined. The goal is a gooey, homogenous cheese mixture. Be patient with this step, as proper melting is key to the bun’s texture.
Step 2: Incorporating Dry Ingredients
Once your cheese mixture is smooth and melted, it’s time to add the dry ingredients. To the melted cheese mixture, add the almond flour and the baking powder. Almond flour provides the base for our buns, giving them structure and a slightly nutty flavor. Baking powder is our leavening agent, helping the buns to rise and become a little fluffy. Gently fold these dry ingredients into the cheese mixture. You want to combine everything until just incorporated. Overmixing at this stage isn’t necessary and can sometimes lead to a slightly tougher bun. The mixture will be quite sticky and dough-like at this point, which is exactly what we’re aiming for.
Step 3: Adding the Eggs
Now it’s time to add the eggs. Crack the three large eggs into the bowl with the cheese and almond flour mixture. Whisk the eggs lightly in a separate small bowl before adding them, if you prefer, although it’s not strictly necessary for this recipe. Then, vigorously mix the eggs into the cheese and almond flour dough. You’ll notice that the dough starts to come together even more and become more manageable. Continue mixing until all the egg is fully incorporated into the dough. This process might feel a little tricky at first because the dough is quite sticky due to the melted cheese. Keep stirring and folding until you have a cohesive, though still somewhat sticky, dough. This is where the protein from the eggs will help bind everything together beautifully.
Step 4: Shaping the Buns
Preheat your oven to 400°F (200°C). Line a baking sheet with parchment paper. This is essential to prevent the sticky dough from adhering to your baking sheet. Now, for shaping the buns. You’ll find the dough to be quite sticky, so it helps to lightly dampen your hands with water or grease them with a little cooking oil. Scoop out portions of the dough, about the size of a golf ball, and gently roll them into rounds on your prepared baking sheet. Aim for about 8-10 buns, depending on how large you want them. Leave a little space between each bun as they will puff up slightly during baking. Don’t worry if they aren’t perfectly uniform; rustic charm is part of their appeal!
Step 5: Baking the Buns
Place the baking sheet into your preheated oven. Bake for approximately 15-20 minutes, or until the buns are golden brown and have a firm texture. The exact baking time will depend on your oven and the size of your buns. You’ll know they’re ready when they are nicely puffed up and the tops have a lovely golden hue. Once baked, remove the baking sheet from the oven and let the keto buns cool on the baking sheet for about 5-10 minutes before transferring them to a wire rack to cool completely. This initial cooling on the sheet helps them set up.
These buns are best enjoyed warm, but they also keep well in an airtight container at room temperature for a couple of days, or in the refrigerator for longer storage. Reheat them gently in a toaster oven or a regular oven for a few minutes to bring back their warmth and delicious texture. Enjoy your homemade keto buns!

Conclusion:
I hope you’re as excited about these easy keto buns as I am! They truly are a game-changer for anyone following a ketogenic lifestyle. The beauty of this recipe lies in its simplicity and the incredible texture and flavor it achieves without traditional flour. These buns are light, slightly chewy, and incredibly versatile, proving that delicious bread is absolutely possible on keto. They’re perfect for your morning avocado toast, a base for mini pizzas, or as a side to your favorite soup or salad. Don’t be afraid to experiment with seasonings too; adding garlic powder, onion powder, or even a pinch of herbs can elevate these buns even further. I truly encourage you to give this recipe a try. I’m confident you’ll be delighted with the results and will find yourself making them again and again.
Frequently Asked Questions:
Can I make these keto buns ahead of time?
Absolutely! These keto buns store wonderfully. Once completely cooled, keep them in an airtight container at room temperature for up to 2 days, or in the refrigerator for up to 5 days. For longer storage, you can freeze them. Make sure they are fully cooled before freezing. You can then simply pop them in the toaster or let them thaw at room temperature when you’re ready to enjoy them.
What are some other keto-friendly fillings or toppings I can use?
The possibilities are endless! Beyond the serving suggestions, think about using them for breakfast sandwiches with beef bacon and eggs, as a bun for your favorite burger, or even sliced and toasted to serve with a creamy dip. You can also sprinkle sesame seeds or everything bagel seasoning on top before baking for an extra layer of flavor and texture.
Easy Keto Buns
Quick and simple keto buns made with cheese and almond flour, perfect for a low-carb lifestyle.
Ingredients
-
3 cups shredded cheese
-
2 ounces cream cheese
-
1 3/4 cups almond flour
-
1 tablespoon baking powder
-
3 large eggs
Instructions
-
Step 1
Melt the shredded cheese and cream cheese together in a microwave-safe bowl, stirring every 30 seconds until smooth. Alternatively, melt in a saucepan over low heat. -
Step 2
In a separate bowl, whisk together the almond flour and baking powder. -
Step 3
Add the beaten eggs to the melted cheese mixture and stir until well combined. -
Step 4
Gradually add the almond flour mixture to the wet ingredients, mixing until a dough forms. -
Step 5
Preheat your oven to 375°F (190°C). Line a baking sheet with parchment paper. -
Step 6
Divide the dough into 6-8 portions and shape them into buns. Place them on the prepared baking sheet. -
Step 7
Bake for 15-20 minutes, or until golden brown and firm to the touch. -
Step 8
Let cool slightly before serving.
Important Information
Nutrition Facts (Per Serving)
It is important to consider this information as approximate and not to use it as definitive health advice.
Allergy Information
Please check ingredients for potential allergens and consult a health professional if in doubt.