Cherry Brownie Ice Cream Sandwiches-Delicious Treat
Cherry Brownie Ice Cream Sandwiches are about to become your new obsession. Imagin extracte sinking your teeth into the rich, fudgy decadence of a homemade brownie, perfectly chewy and studded with bursts of sweet, tart cherries. Then, picture that sandwiched around a generous scoop of creamy, dreamy ice cream. It’s a flavor combination that just sings, a symphony of textures and tastes that awakens pure dessert joy. We all love ice cream sandwiches for their nostalgic comfort, but these Cherry Brownie Ice Cream Sandwiches elevate that classic treat to an entirely new level. The interplay between the deep chocolate, the bright cherry, and the cool ice cream is what truly makes them special, a sophisticated yet utterly irresistible indulgence that’s perfect for any occasion, or no occasion at all!
The Ultimate Summer Treat
Why You’ll Adore These Cherry Brownie Ice Cream Sandwiches

Cherry Brownie Ice Cream Sandwiches
Get ready for a dessert that’s a total game-changer! We’re talking about a delightful fusion of chewy, fudgy brownies and creamy, dreamy ice cream, all kicked up a notch with bursts of sweet, tart cherries. These Cherry Brownie Ice Cream Sandwiches are surprisingly simple to make and guaranteed to impress. They’re perfect for a summer treat, a special occasion, or honestly, just because you deserve something amazing. The combination of warm brownie, cold ice cream, and juicy cherries is pure bliss. Let’s get started on creating these little bites of heaven!
Ingredients:
Baking the Perfect Brownies
The foundation of our incredible ice cream sandwiches is a batch of perfectly chewy and fudgy brownies. We’re going to start by getting our oven preheated and our pan prepped. This is where the magic begin extracts!
1. Prepare Your Baking Station: First things first, preheat your oven to 350°F (175°C). While the oven is heating up, grab an 8×8 inch baking pan. I like to line mine with parchment paper, leaving a slight overhang on the sides. This makes lifting the finished brownies out a breeze and cleanup even easier. You can grease and flour the pan if you don’t have parchment, but parchment paper is my secret weapon for easy brownie removal.
2. Melt the Butter and Sugar: In a medium saucepan over low heat, or in a microwave-safe bowl, melt your ½ cup of unsalted butter. Once melted, stir in the ½ cup of granulated sugar and the ½ cup of brown sugar. Whisk them together until the mixture is smooth and well combined. The sugars will start to dissolve, creating a beautiful, glossy base for our brownies. Don’t rush this step; a gently heated sugar mixture helps create that wonderfully fudgy texture.
3. Incorporate Wet Ingredients and Dry Ingredients: Remove the saucepan from the heat (or take the bowl out of the microwave). Let it cool for just a minute or two so it’s not piping hot. Now, crack in your 2 large eggs, one at a time, whisking well after each addition until fully incorporated. Add the 1 tsp of vanilla extract and give it another good whisk. In a separate small bowl, whisk together your ⅓ cup of cocoa powder, ½ cup of all-purpose flour, and ¼ tsp of salt. This ensures that the dry ingredients are evenly distributed, preventing any pockets of flour or cocoa. Gradually add the dry ingredients to the wet ingredients, mixing with a spatula or wooden spoon until just combined. Be careful not to overmix here; overmixing can lead to tough brownies, and we want them tender and chewy. A few streaks of flour are okay at this stage.
4. Bake and Cool the Brownies: Pour the brownie batter evenly into your prepared 8×8 inch baking pan. Spread it out with your spatula so the surface is smooth. Place the pan in the preheated oven and bake for 20-25 minutes, or until a toothpick inserted into the center comes out with moist crum extractbs attached (not wet batter). We want them slightly underbaked for that perfect chewy center. Once they’re done, carefully remove them from the oven and let them cool completely in the pan on a wire rack. This is a crucial step! Trying to cut warm brownies for ice cream sandwiches will be a sticky, crum extractbly disaster. Patience is key here. Once completely cool, you can lift them out of the pan using the parchment paper overhangs.
Assembling Your Masterpieces
With our perfectly baked and cooled brownies, it’s time for the fun part – transforming them into ice cream sandwiches!
5. Slice, Scoop, and Assemble: Once the brownies are completely cool, cut them into uniform squares. I usually get about 9-12 squares, depending on how large I want my sandwiches. Now, take your 1½ cups of vanilla ice cream and let it soften just enough so it’s spreadable but not melted. You want it to be pliable enough to scoop easily. Stir your ½ cup of chopped cherries into the softened ice cream. This ensures that the cherry goodness is distributed throughout. Take one brownie square, spread a generous scoop of the cherry-infused ice cream on top, and then gently place another brownie square on top, like a lid. Press down lightly to create your sandwich. Repeat this process until you’ve used up your ice cream and brownies.
6. The Finishing Touch (Optional but Recommended!): For an extra touch of decadence, melt your ¼ cup of chocolate chips. You can do this in a small microwave-safe bowl in 30-second intervals, stirring in between, or use a double boiler. Once melted and smooth, drizzle the chocolate over your assembled ice cream sandwiches. This not only looks fantastic but adds another layer of delicious chocolatey flavor. You can also gently press sprinkles or more chopped cherries onto the exposed ice cream before the chocolate drizzle sets for extra flair.
Chill and Enjoy!
Place your finished Cherry Brownie Ice Cream Sandwiches on a parchment-lined baking sheet and pop them into the freezer for at least 1-2 hours. This allows the ice cream to firm up, making them easier to handle and enjoy. Once frozen, they’re ready to be devoured! These are best enjoyed straight from the freezer. You’ve just created a dessert that’s sure to be a hit. Enjoy every delightful bite!
Conclusion:
And there you have it – the ultimate indulgence: Cherry Brownie Ice Cream Sandwiches! This recipe is a winner because it perfectly balances the rich, fudgy texture of homemade brownies with the cool, creamy sweetness of your favorite ice cream, all punctuated by bursts of tart cherries. It’s a truly decadent treat that’s surprisingly easy to make and guaranteed to impress. Imagin extracte biting into that warm, chewy brownie giving way to the melting ice cream and juicy cherries – pure bliss!
These delightful sandwiches are fantastic served straight from the freezer for an instant dessert fix. For a slightly more refined presentation, consider pressing a few extra chopped cherries or chocolate shavings onto the sides of the ice cream before sandwiching. They’re also a showstopper at parties and potlucks. Don’t be afraid to get creative with variations! Swap the cherries for raspberries or dark chocolate chips, use a different ice cream flavor like vanilla bean or mint chocolate chip, or even experiment with different brownie recipes.
I truly encourage you to give this Cherry Brownie Ice Cream Sandwich recipe a try. It’s a fantastic way to elevate your dessert game and create something truly memorable. The effort is minimal, but the reward is immense. Get ready for rave reviews!
Frequently Asked Questions:
Can I make the brownies ahead of time?
Absolutely! The brownies can be baked a day or two in advance and stored at room temperature in an airtight container. This makes assembling the ice cream sandwiches even quicker when you’re ready to serve.
What kind of ice cream works best?
While I love a classic vanilla or chocolate, any dense, firm ice cream will work beautifully. Think about flavors that complement cherry and chocolate, like cherry, dark chocolate, or even a rich salted caramel. Avoid very soft or airy ice creams, as they can melt too quickly.
How do I store leftover ice cream sandwiches?
Once assembled, wrap each Cherry Brownie Ice Cream Sandwich tightly in plastic wrap, then place them in an airtight freezer-safe container or bag. This prevents freezer burn and keeps them delicious for up to a month.
Cherry Brownie Ice Cream Sandwiches
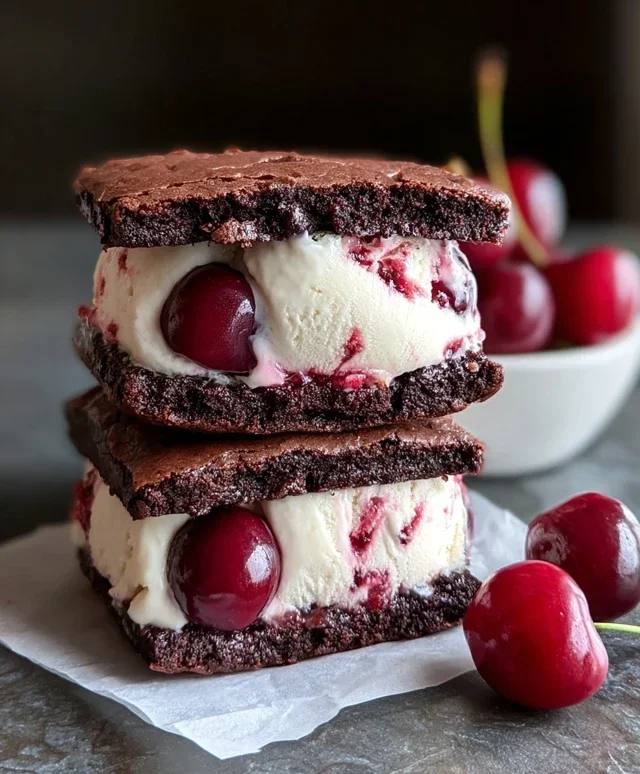
A delightful dessert featuring chewy cherry brownies sandwiched with creamy vanilla ice cream and drizzled with chocolate.
Ingredients
-
½ cup unsalted butter
-
½ cup granulated sugar
-
½ cup brown sugar
-
2 large eggs
-
1 tsp vanilla extract
-
⅓ cup cocoa powder
-
½ cup all-purpose flour
-
¼ tsp salt
-
1½ cups vanilla ice cream, slightly softened
-
½ cup chopped cherries (fresh or frozen)
-
¼ cup chocolate chips, melted (for drizzle)
Instructions
-
Step 1
Preheat oven to 350°F (175°C). Line a baking sheet with parchment paper. -
Step 2
In a large bowl, cream together the unsalted butter, granulated sugar, and brown sugar until light and fluffy. -
Step 3
Beat in the large eggs one at a time, then stir in the vanilla extract. -
Step 4
In a separate bowl, whisk together the cocoa powder, all-purpose flour, and salt. -
Step 5
Gradually add the dry ingredients to the wet ingredients, mixing until just combined. -
Step 6
Fold in the chopped cherries. -
Step 7
Spread the batter evenly onto the prepared baking sheet to form a thin layer. -
Step 8
Bake for 15-20 minutes, or until a toothpick inserted into the center comes out with moist crumbs. -
Step 9
Let the brownie cool completely on the baking sheet, then cut into desired sandwich-sized rectangles. -
Step 10
Soften the vanilla ice cream slightly. Spread a layer of ice cream onto one brownie rectangle and top with another. -
Step 11
Press gently to create sandwiches. If desired, drizzle with melted chocolate chips. -
Step 12
Freeze for at least 1 hour, or until firm.
Important Information
Nutrition Facts (Per Serving)
It is important to consider this information as approximate and not to use it as definitive health advice.
Allergy Information
Please check ingredients for potential allergens and consult a health professional if in doubt.