Easy Chia Seed Pudding Recipe – Creamy & Delicious
Chia seed pudding is a delightful, fuss-free way to start your day or enjoy a healthy snack. If you’re searching for a simple yet incredibly satisfying recipe, you’ve landed in the right place. We’ll dive into the magic of creating the perfect chia seed pudding, a dish that has taken the healthy eating world by storm, and for good reason!
Why We Love Chia Seed Pudding
What makes this humble bowl of goodness so special? It’s the incredible texture – that perfect creamy, slightly gelatinous consistency that’s so surprisingly luxurious. And the versatility! You can customize your chia seed pudding with endless flavor combinations, from fresh berries and tropical fruits to rich cocoa and warming spices. It’s packed with fiber, protein, and omega-3 fatty acids, making it a nutritional powerhouse disguised as a treat. Forget complicated steps and long baking times; this easy chia seed pudding recipe is your ticket to healthy indulgence.
Get Ready to Whip Up Your New Favorite
Prepare to be amazed by how little effort it takes to create something so delicious and beneficial for your body. Whether you’re a seasoned health enthusiast or just dipping your toes into healthier eating habits, this recipe is a game-changer.
Chia Seed Pudding Recipe
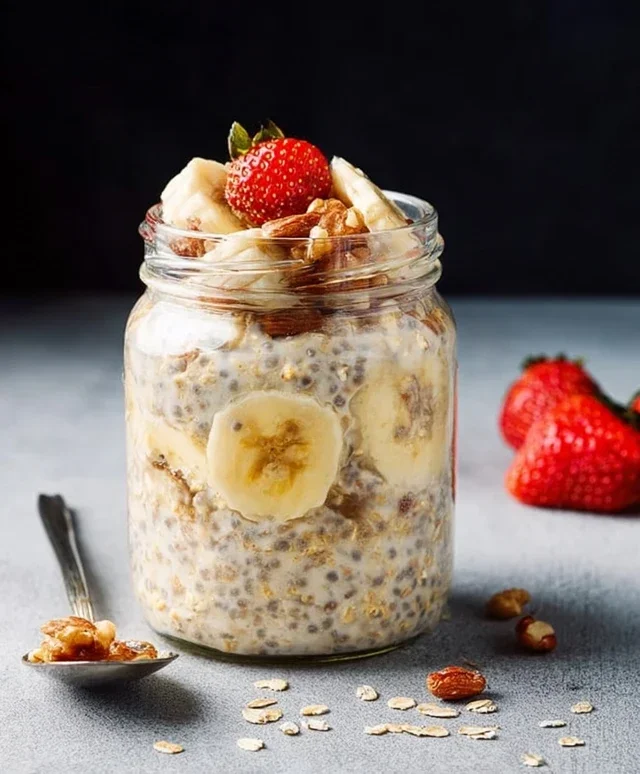
Chia seed pudding has become a breakfast and snack superstar for good reason! It’s incredibly simple to make, packed with nutrients, and wonderfully versatile. I love starting my day with a bowl of this creamy, dreamy goodness or having it as a refreshing afternoon treat. The beauty of chia pudding lies in its ability to transform humble chia seeds into a delightful, pudding-like consistency with just a few ingredients and some patient waiting. It’s a fantastic way to incorporate fiber, omega-3 fatty acids, and protein into your diet effortlessly. Plus, the base recipe is so customizable, allowing you to tailor it to your exact flavor preferences. Whether you’re a seasoned kitchen pro or a complete begin extractner, you’ll find this recipe a breeze to master.
Let’s get started on creating your own batch of this healthy and delicious dessert!
Ingredients:
Instructions:
Here’s how to whip up your delicious chia seed pudding:
1. Gather Your Ingredients and Tools: Before you begin extract, make sure you have all your ingredients measured out and ready to go. You’ll also need a small bowl or jar with a lid, and a whisk or fork for stirring. Having everything prepped will make the process much smoother. I like to use a glass jar with a lid so I can just give it a good shake and store it in the fridge without transferring it to another container.
2. Combine the Base Ingredients: In your chosen bowl or jar, add the 3 tablespoons of chia seeds. Then, pour in your 3/4 cup of milk of choice. Now, it’s time to add the sweetness and flavor. Drizzle in the 1 tablespoon of maple syrup (or your preferred sweetener) and add the 1 teaspoon of vanilla extract. Using vanilla extract is crucial for that classic pudding flavor, but feel free to experiment with other extracts like almond extract for a different profile.
3. Whisk Thoroughly to Prevent Clumping: This is a very important step for achieving a smooth, lump-free pudding. Grab your whisk or fork and stir the mixture vigorously for at least 30 seconds to a minute. You want to ensure that every single chia seed is coated in the liquid and that there are no pockets of dry seeds forming at the bottom or sticking to the sides. Pay special attention to the bottom of the bowl to make sure no seeds are settling there. If you’re using a jar, simply put the lid on tightly and give it a really good shake. The goal here is to break up any clumps as soon as they start to form.
4. Let it Sit and Hydrate (Initial Stage): Once you’ve whisked everything together thoroughly, place the lid on your container or cover your bowl. Let the mixture sit at room temperature for about 5 to 10 minutes. During this initial resting period, the chia seeds will begin extract to absorb some of the liquid and start to swell. This is also your opportunity to give it another quick stir or shake. This second stir is key because as the seeds start to gel, they can sometimes stick together. A quick stir after this initial period will help to break up any new clumps and ensure an even distribution of the hydrating seeds throughout the mixture. This step is vital for a creamy, pudding-like texture rather than a gritty one.
5. Chill to Thicken and Develop Flavor: After the initial 5-10 minute rest and second stir, it’s time for the magic to happen in the refrigerator. Seal your container tightly and place it in the fridge. You’ll want to let it chill for at least 2 to 4 hours, or ideally, overnight. The longer it chills, the thicker and more pudding-like it will become. Overnight chilling allows the chia seeds to fully absorb the liquid and form that wonderful gel structure, resulting in a rich, creamy consistency that’s perfect for serving. This chilling period also allows the flavors to meld together beautifully.
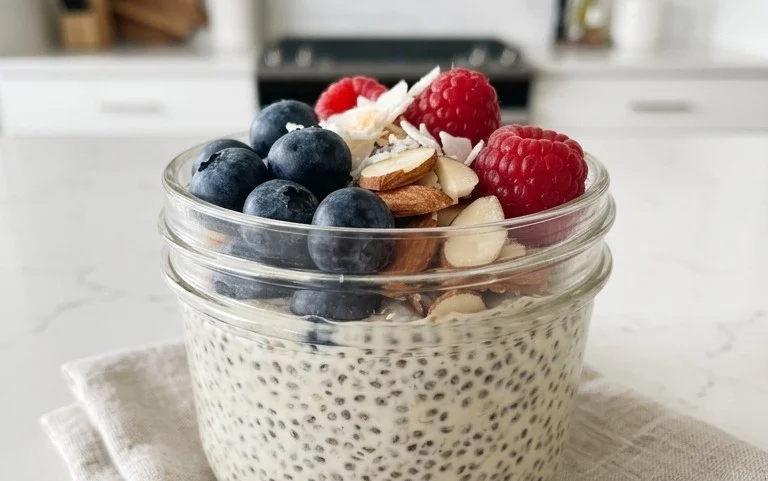
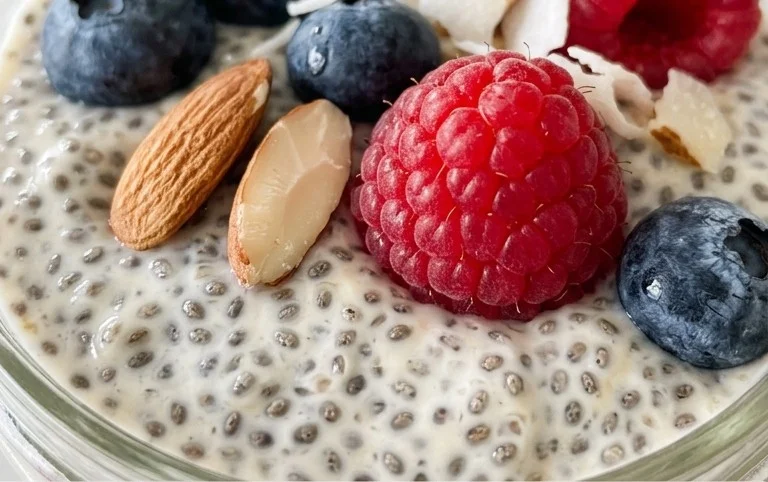
6. Serve and Enjoy! Once your chia pudding has reached your desired consistency, it’s ready to be devoured! Give it a final stir before serving. You can enjoy it straight from the bowl or jar. The possibilities for toppings are endless! Some of my favorites include fresh berries (like strawberries, blueberries, or raspberries), sliced bananas, a sprinkle of granola for added crunch, a dollop of yogurt, toasted nuts or seeds, a drizzle of honey or more maple syrup, or even a dusting of cinnamon. Get creative and make it your own! This recipe makes one serving, but it’s easily scalable if you want to make a larger batch for the week.
This chia seed pudding is not only a healthy choice but also a fantastic canvas for your culinary creativity. Enjoy!
Conclusion:
There you have it – a simple yet incredibly satisfying chia seed pudding recipe that’s as good for you as it is delicious! We love this recipe because it’s so versatile, requiring minimal effort for a powerhouse of nutrition. Chia seeds are packed with fiber, omega-3 fatty acids, and protein, making this pudding a fantastic choice for a healthy breakfast, a satisfying snack, or even a light dessert. Its creamy texture and ability to absorb flavors make it a blank canvas for your culinary creativity.
Feel free to serve it chilled straight from the fridge, or get adventurous with toppings. Fresh berries, a drizzle of honey or maple syrup, a sprinkle of granola for crunch, or a dollop of yogurt all elevate this basic chia seed pudding to something truly special. Don’t be afraid to experiment with different milks like almond, oat, or coconut milk for varying flavor profiles. You can also add a touch of vanilla extract, cocoa powder for a chocolatey twist, or even a pinch of cinnamon for warmth.
We highly encourage you to give this easy chia seed pudding a try. It’s the perfect way to start your day on a nourishing note or to refuel your body anytime. Get ready to discover your new favorite go-to healthy treat!
Frequently Asked Questions:
How long does chia seed pudding take to set?
Typically, chia seed pudding needs at least 4 hours in the refrigerator to set properly. For the best texture, we recommend letting it chill overnight.
Can I make chia seed pudding ahead of time?
Absolutely! This recipe is ideal for meal prepping. You can make a batch at the begin extractning of the week and enjoy it for several days. Just ensure it’s stored in an airtight container in the fridge.
What happens if I don’t use enough liquid?
If you don’t use enough liquid, your chia seed pudding will be very thick and may not achieve that signature pudding-like consistency. It might also be difficult to eat. The seeds need sufficient liquid to absorb and gel effectively.
Chia Seed Pudding Recipe
A simple and healthy chia seed pudding, perfect for breakfast or a snack.
Ingredients
-
3 tablespoons chia seeds
-
1 tablespoon maple syrup
-
1 teaspoon vanilla extract
-
3/4 cup almond milk
-
1/4 cup plain yogurt
-
1/2 cup fresh berries
Instructions
-
Step 1
In a bowl or jar, combine the chia seeds, maple syrup, and vanilla extract. -
Step 2
Add the milk of choice (almond milk in this case) and whisk or stir well to combine, ensuring no clumps of chia seeds form. -
Step 3
Cover the bowl or jar and refrigerate for at least 15 minutes, or preferably for at least 2 hours, or overnight, to allow the chia seeds to gel. -
Step 4
Before serving, stir the pudding to ensure a smooth consistency. -
Step 5
Stir in the plain yogurt until fully incorporated. -
Step 6
Top with fresh berries before serving.
Important Information
Nutrition Facts (Per Serving)
It is important to consider this information as approximate and not to use it as definitive health advice.
Allergy Information
Please check ingredients for potential allergens and consult a health professional if in doubt.