Perfect Grilled Pizza Recipe – Easy Guide
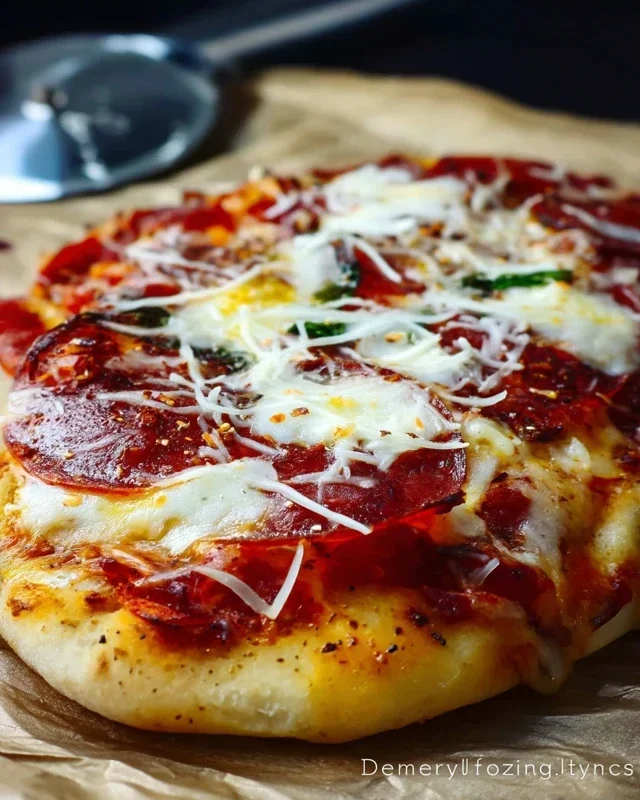
How to Make the Perfect Grilled Pizza is an art form, and one I’ve spent countless hours perfecting. There’s something undeniably magical about the char and smoky essence that a grill imparts to a pizza, elevating it far beyond its oven-baked cousin. Forget soggy bottoms and unevenly cooked toppings; grilled pizza delivers an unparalleled crispness and a delightful chew that’s simply addictive. The allure lies in its simplicity, its rustic charm, and the sheer satisfaction of creating a restaurant-quality meal right in your backyard. We’re talking about that slightly blistered crust, the bubbly cheese melting into a symphony of flavors, and the aroma that will have your neighbors knocking. Get ready to transform your outdoor cooking game and discover the joy of crafting your own incredible grilled pizza.
How to Make the Perfect Grilled Pizza
There’s something truly magical about pizza, and when you elevate it by grilling it, you unlock a whole new level of flavor and texture. The intense heat of the grill creates a wonderfully crispy, slightly smoky crust, while the toppings get perfectly blistered and melty. Forget soggy, bland crusts – grilled pizza is a game-changer! It might sound intimidating, but I promise you, it’s surprisingly straightforward and incredibly rewarding. Let’s dive into how you can create your own perfect grilled pizza right in your backyard.
Ingredients:
Preparing Your Dough and Grill
The foundation of any great pizza is the dough. If you’re using store-bought dough, let it come to room temperature for at least 30 minutes to an hour. This makes it much easier to stretch and handle. If you’re making your own, ensure it’s proofed and ready to go.
Next, let’s talk about the grill. You want to preheat your grill to a medium-high heat, around 400-450°F (200-230°C). This temperature is crucial for achieving that perfect crispy crust without burning the toppings. If you have a gas grill, you can easily control the temperature. For a charcoal grill, arrange your coals for direct and indirect heat, aiming for a consistent heat zone. Clean your grill grates thoroughly with a wire brush. This prevents the dough from sticking and ensures a clean cooking surface. Once the grates are clean, you can lightly oil them by dipping a paper towel in oil (use tongs to hold it) and wiping the hot grates. This is an extra step that really helps prevent sticking.
Assembling Your Grilled Masterpiece
This is where the fun begin extracts! You’ll want to work relatively quickly once your dough is on the grill, so have all your ingredients prepped and within easy reach.
1. Stretch and Oil the Dough: Lightly flour a clean surface and gently stretch your pizza dough into two roughly 12-inch rounds. Don’t aim for perfection; rustic shapes are part of the charm! Brush one side of each dough round generously with olive oil. This oiled side will be the side that hits the grill first. The oil helps create a barrier, prevents sticking, and encourages a beautiful char.
2. Grill the First Side: Carefully place one oiled dough round, oiled-side down, onto the preheated grill. Close the lid and cook for about 2-4 minutes. You’re looking for the dough to puff up and develop some golden-brown char marks on the bottom. Keep an eye on it to prevent burning. Use your tongs to lift an edge and check for color. Once you see those lovely grill marks and the dough is firm enough to handle, it’s time to flip.
3. Flip and Top: Using tongs or a wide spatula, carefully flip the dough over. Now, the grilled side is facing up. Work quickly! Brush the grilled side (which is now the top) with a thin layer of olive oil. Spread your pizza sauce evenly over the grilled side, leaving a small border for the crust. Sprinkle generously with mozzarella cheese, then Parmesan cheese. Add your favorite toppings. Don’t overload the pizza, as too many toppings can make the crust soggy.
4. Grill the Second Side: Carefully close the grill lid. Continue grilling for another 4-7 minutes, or until the cheese is melted and bubbly and the bottom crust is golden brown and crispy. The exact time will depend on your grill’s heat and how thick your dough is. You want the cheese to be fully melted and the crust to be cooked through without being burnt. If one side is cooking faster than the other, you can rotate the pizza a quarter turn.
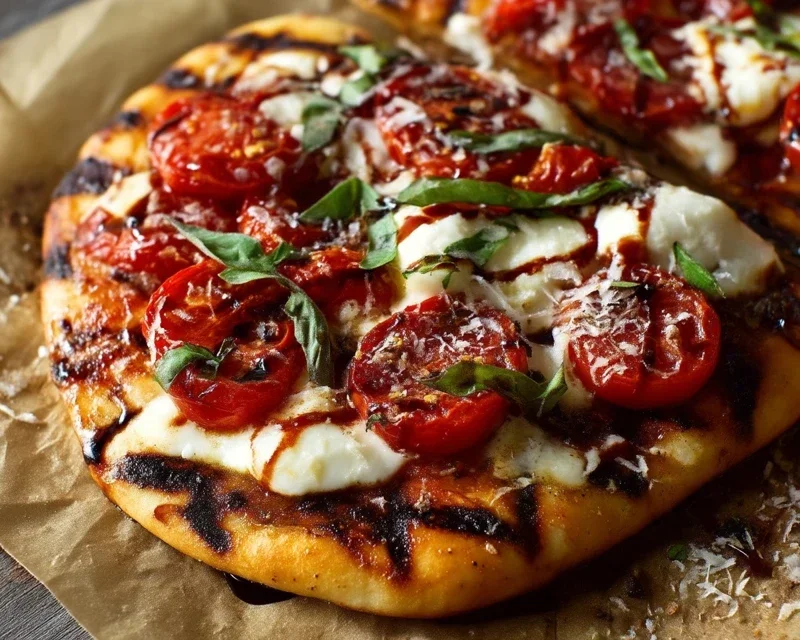
5. Rest and Serve: Once your pizza is perfectly cooked, carefully remove it from the grill using a spatula and pizza peel. Transfer it to a cutting board. Let it rest for just a minute or two. This allows the cheese to set slightly and prevents it from oozing off when you slice it. Garnish with fresh basil if you’re using it, slice, and enjoy immediately! The smoky flavor and crispy texture are best enjoyed piping hot.
Repeat the process for your second pizza. Grilled pizza is fantastic for gatherings, parties, or just a fun weeknight dinner. Don’t be afraid to experiment with different sauce bases (pesto, white sauce) and topping combinations. The beauty of grilled pizza is its versatility and the incredible flavor it imparts. Happy grilling!
Conclusion:
There you have it – your definitive guide to crafting the perfect grilled pizza right in your own backyard! This recipe isn’t just about following steps; it’s about unlocking a whole new level of flavor and texture that oven-baked pizzas often can’t achieve. The smoky char from the grill, the slightly crisp yet chewy crust, and the quick cooking time combine to create a truly impressive and delicious meal. Whether you’re a seasoned grill master or a begin extractner, you’ll find this method surprisingly accessible and incredibly rewarding. The beauty of this grilled pizza recipe lies in its versatility, allowing for endless topping combinations.
For serving, imagin extracte a vibrant summer salad on the side, or perhaps some grilled vegetables to complement the smoky notes. Don’t be afraid to experiment with variations! Think classic Margherita with fresh mozzarella, basil, and ripe tomatoes, or get adventurous with spicy beef chorizo and pickled jalapeños. You could even create a dessert pizza with mascarpone, berries, and a drizzle of honey. So, gather your ingredients, fire up the grill, and prepare to wow yourself and your guests with the best grilled pizza you’ve ever made. I truly encourage you to give this a try – the results are sensational!
Frequently Asked Questions:
Can I make the dough ahead of time?
Absolutely! Pizza dough can typically be made up to 2-3 days in advance and stored, covered, in the refrigerator. This allows the flavors to develop even further, leading to a more delicious crust. Just bring it to room temperature for about an hour before you plan to grill.
What kind of grill works best for pizza?
Both gas and charcoal grills work wonderfully. Gas grills offer more precise temperature control, which can be helpful for begin extractners. Charcoal grills impart a deeper smoky flavor. The key is to get your grill to a medium-high heat and create a clean, slightly oiled grilling surface.
The Perfect Grilled Pizza
Master the art of smoky, crispy grilled pizza at home.
Ingredients
-
1 pound pizza dough, store-bought or homemade
-
1/2 cup pizza sauce
-
8 ounces fresh mozzarella cheese, sliced
-
1/4 cup grated Parmesan cheese
-
1 tablespoon olive oil
-
1/4 cup thinly sliced red onion
-
1/2 cup sliced bell peppers (any color)
-
1/4 cup sliced mushrooms
-
Optional: crumbled Italian sausage (pork)
Instructions
-
Step 1
Preheat your grill to medium-high heat (around 400-450°F or 200-230°C). Clean and lightly oil the grill grates. -
Step 2
Divide the pizza dough into two portions. On a lightly floured surface, stretch or roll each portion into a 10-12 inch circle or oval. -
Step 3
Lightly brush one side of each dough circle with olive oil. Carefully place one dough circle, oiled side down, onto the preheated grill. -
Step 4
Grill for 2-4 minutes, or until the bottom is golden brown and has grill marks. While grilling, brush the top (untoasted) side with olive oil. -
Step 5
Flip the dough. Quickly spread pizza sauce over the grilled side, leaving a small border for the crust. Top with mozzarella cheese, Parmesan cheese, and desired toppings (e.g., red onion, bell peppers, mushrooms, crumbled Italian sausage). -
Step 6
Close the grill lid and cook for another 4-7 minutes, or until the cheese is melted and bubbly and the crust is golden brown and cooked through. -
Step 7
Carefully remove the pizza from the grill. Let it cool for a minute before slicing and serving.
Important Information
Nutrition Facts (Per Serving)
It is important to consider this information as approximate and not to use it as definitive health advice.
Allergy Information
Please check ingredients for potential allergens and consult a health professional if in doubt.