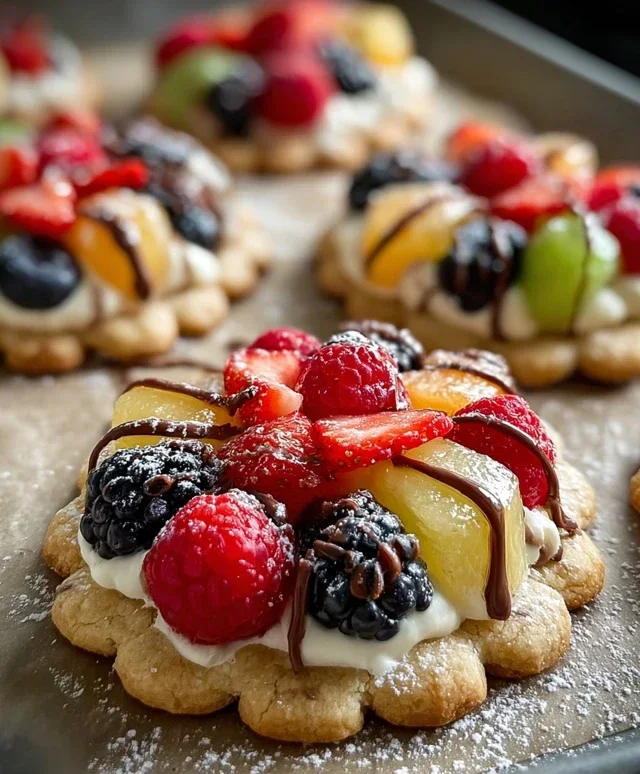
Cheesecake Fruit Salad Roll Ups – Easy Dessert Delight
Cheesecake Fruit Salad Roll Ups are about to become your new obsession! Imagin extracte the creamy, tangy delight of cheesecake filling swirled with vibrant, juicy fruits, all wrapped up in a tender, bite-sized package. It’s the perfect marriage of dessert and healthy indulgence, and honestly, who can resist that? We love them because they’re a burst of sunshine in every bite, offering a delightful textural contrast that’s both satisfying and refreshing. What truly makes these Cheesecake Fruit Salad Roll Ups special is their incredible versatility and effortless elegance. Whether you’re looking for a show-stopping brunch item, a playful dessert for kids, or a light and delightful snack to brighten your afternoon, these little beauties deliver every single time. Get ready to impress yourself and everyone lucky enough to share them!

Ingredients:
Instructions:
1. Prepare the Cream Cheese Filling
First things first, let’s get our creamy, dreamy filling ready. In a medium bowl, combine the softened cream cheese and ½ cup of the unsalted butter. I like to make sure both are truly at room temperature; it makes them so much easier to work with and ensures a super smooth filling without any lumps. Using an electric mixer, beat these together until they are light and fluffy. This usually takes about 2-3 minutes. Next, gradually add the 1 ½ cups of powdered sugar, mixing until it’s fully incorporated and the mixture is smooth and creamy. Don’t rush this step; adding the sugar slowly helps prevent a powdery mess. Now, stir in the 1 teaspoon of vanilla extract. This is where the magic really starts to happen, as that beautiful vanilla aroma fills the air. If you’re using pre-made whipped cream, gently fold in the 1 ¼ cups now. If you’re making your own whipped cream, whip the chilled heavy cream with the 2.5 tablespoons of powdered sugar until stiff peaks form, then gently fold it into the cream cheese mixture. Be careful not to overmix once the whipped cream is in, as you want to keep that airy texture. This filling will be the luscious base for our fruit salad roll-ups.
2. Create the Vibrant Fruit Salad
Now for the star of the show – the fresh fruit! In a separate bowl, gently combine all your prepared fruits: the 2/3 cup fresh blueberries, 2/3 cup small diced fresh strawberries, 3 peeled and diced small peaches, 2 peeled and small diced kiwis, and the ½ cup fresh raspberries, sliced in half. I like to keep the raspberries separate until just before assembling to prevent them from bleeding too much color into the other fruits, though it’s not strictly necessary. The key here is to have all your fruit diced into small, manageable pieces so they distribute evenly within the roll-ups and are easy to bite into. You want a good mix of colors and textures for visual appeal and a burst of flavor. Give everything a very gentle toss to combine. The natural sweetness of the fruit will be wonderful, and the slight tartness from the raspberries and kiwis will provide a nice contrast to the sweet filling.
3. Assemble the Tortilla Wraps
This is where it all comes together! Lay one of the large tortillas flat on a clean surface. Spread a generous, even layer of the cream cheese filling over the entire surface of the tortilla, leaving about a ½-inch border around the edges. Don’t make the layer too thick, or it will be difficult to roll. Now, sprinkle about 1/5th of the sugar-free vanilla instant pudding powder evenly over the cream cheese layer. This adds a subtle vanilla flavor and a bit of thickening power. Next, carefully spoon about 1/5th of your beautiful fruit salad in a line across the tortilla, roughly one-third of the way up from the bottom edge. This placement will help ensure that the fruit is nicely distributed when rolled.
4. Roll and Prepare for Slicing
This step requires a little finesse to get perfect rolls. Tightly roll up the tortilla, starting from the edge with the fruit. Fold in the sides slightly as you roll to create a neat package, similar to how you would roll a burrito. The cream cheese filling will help seal the edges. Once rolled, you can either wrap the roll-up tightly in plastic wrap to firm it up in the refrigerator for about 30 minutes (this makes slicing much cleaner) or proceed directly to slicing if you’re in a hurry, though a little chill time is recommended. Repeat this process with the remaining tortillas, cream cheese filling, pudding powder, and fruit until you have 4-5 beautifully filled roll-ups.
5. Create the Cinnamon Sugar Coating and Serve
For the final touch, let’s add a delightful crunchy coating. In a shallow dish or plate, combine the ½ cup sugar and 1 teaspoon cinnamon. Stir well to distribute the cinnamon evenly. If you prefer a stronger cinnamon flavor, feel free to add a little more! Now, brush the melted butter over the outside of each rolled-up tortilla. This melted butter will help the cinnamon sugar mixture adhere to the rolls. Then, generously roll each buttered tortilla in the cinnamon sugar mixture, ensuring it’s well coated on all sides. Slice each roll-up into 1-inch thick rounds. You can use a serrated knife for cleaner cuts, especially if the rolls have been chilled. Arrange the cheesecake fruit salad roll-ups on a serving platter and enjoy! These are fantastic served immediately or chilled for a delightful make-ahead treat. They are perfect for picnics, parties, or just a special dessert.

Conclusion:
So there you have it! These Cheesecake Fruit Salad Roll Ups are a delightful and surprisingly simple way to bring together the creamy indulgence of cheesecake with the vibrant freshness of fruit. They’re perfect for a light dessert, a festive brunch, or even a fun afternoon snack. The beauty of this recipe lies in its versatility. You can customize the fruit filling to whatever is in season or whatever your personal favorites are. The smooth cheesecake filling provides a wonderful canvas for all sorts of fruity flavors and textures.
We’ve found these roll ups are fantastic served chilled, allowing the flavors to meld together. For an extra touch, consider a light dusting of powdered sugar or a drizzle of honey. If you’re feeling adventurous, try adding a sprinkle of toasted nuts like almonds or pistachios for a delightful crunch.
I truly encourage you to give these Cheesecake Fruit Salad Roll Ups a try. They are sure to impress your guests and become a go-to recipe in your dessert repertoire. Don’t be afraid to experiment with different fruits and even consider adding a touch of vanilla extract or a pinch of cinnamon to the cream cheese mixture for an extra layer of flavor.
Frequently Asked Questions:
Can I make these ahead of time?
Yes, you absolutely can! It’s best to assemble them and then refrigerate them for at least 30 minutes before serving. This allows the cream cheese filling to firm up and the flavors to develop. They can be stored in the refrigerator for up to a day, though they are freshest when consumed sooner.
What are some other fruit combinations that would work well?
The possibilities are endless! Think beyond the basics: berries like raspberries and blueberries are wonderful. Tropical fruits like diced mango and pineapple add a lovely sweetness. Even chopped grapes or finely diced apple can be delicious. Just ensure the fruit is cut into small, manageable pieces.
Can I use store-bought tortillas?
Yes, you can! While some recipes might call for homemade tortillas, standard, soft flour tortillas work perfectly for these Cheesecake Fruit Salad Roll Ups and make the process even quicker.
Cheesecake Fruit Salad Roll Ups
A delightful and refreshing dessert featuring a creamy cheesecake filling, fresh fruit salad, all rolled up in a warm tortilla with a cinnamon-sugar glaze.
Ingredients
-
½ cup unsalted butter, room temperature
-
1 ½ cups powdered sugar
-
6 oz cream cheese, room temperature
-
1 teaspoon vanilla extract
-
1 ¼ cups whipped cream
-
2/3 cup fresh blueberries
-
2/3 cup small diced fresh strawberries
-
3 small peaches, peeled and diced
-
2 kiwis, peeled and small diced
-
½ cup fresh raspberries, sliced in half
-
2 (1 oz) boxes sugar-free vanilla instant pudding
-
4–5 large tortillas, room temperature
-
2–3 tablespoons unsalted butter, melted
-
½ cup sugar
-
1 teaspoon cinnamon
Instructions
-
Step 1
In a large bowl, cream together the softened unsalted butter and powdered sugar until smooth. Add the cream cheese and vanilla extract, beating until well combined and no lumps remain. -
Step 2
Gently fold in the whipped cream until the mixture is light and fluffy. Set aside. -
Step 3
In a separate bowl, combine the blueberries, strawberries, diced peaches, diced kiwis, and raspberries for the fruit salad. Toss gently. -
Step 4
Prepare the sugar-free vanilla instant pudding according to package directions, then gently fold it into the cream cheese mixture. This will thicken the filling. -
Step 5
Spread a generous layer of the cheesecake filling onto each tortilla, leaving a small border. Top the filling with a portion of the fresh fruit salad. -
Step 6
Carefully roll up each tortilla tightly, tucking in the sides as you go, to form a neat roll-up. -
Step 7
In a small bowl, combine the melted unsalted butter, sugar, and cinnamon. Mix well to create the cinnamon-sugar glaze. -
Step 8
Brush the tops of the roll-ups with the cinnamon-sugar glaze. Serve immediately or chill for later enjoyment.
Important Information
Nutrition Facts (Per Serving)
It is important to consider this information as approximate and not to use it as definitive health advice.
Allergy Information
Please check ingredients for potential allergens and consult a health professional if in doubt.