Honey Garlic Shrimp Bowls – Easy Quick Dinner
Honey garlic shrimp bowls are a weeknight dinner revelation, offering a delightful explosion of sweet, savory, and garlicky flavors that I just can’t get enough of. If you’re anything like me, you’re constantly on the hunt for meals that are both incredibly delicious and astonishingly easy to whip up after a long day. This is precisely where the magic of honey garlic shrimp bowls truly shines. People adore them because they hit all the right notes: tender, succulent shrimp coated in a sticky, irresistible glaze, served over a bed of fluffy rice and vibrant, fresh veggies. It’s the perfect balance of textures and tastes, making each bite a miniature celebration. What makes this particular honey garlic shrimp bowl recipe so special is its incredible versatility and the way it elevates simple ingredients into something truly extraordinary, proving that gourmet-worthy meals don’t have to be complicated.
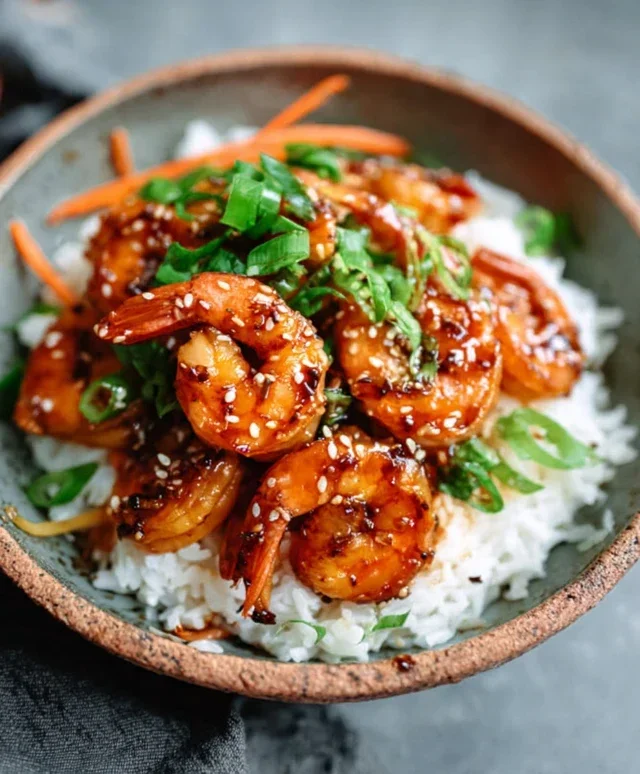
Honey Garlic Shrimp Bowls
Get ready to whip up a seriously delicious and incredibly easy meal that will have everyone asking for seconds! These Honey Garlic Shrimp Bowls are the perfect weeknight dinner – they’re packed with flavor, come together in a flash, and are so customizable. Imagin extracte succulent shrimp coated in a sticky, sweet, and savory honey garlic sauce, served over fluffy rice and topped with your favorite fresh veggies. It’s a symphony of textures and tastes that’s sure to become a staple in your kitchen. This recipe is designed for maximum flavor with minimal fuss, making it ideal for busy evenings or when you’re craving something impressive without a lot of effort.
Ingredients:
Cooking Instructions:
Prepare the Shrimp and Sauce Components
Before we even think about cooking, let’s get everything prepped. This makes the actual cooking process so much smoother. First, if you’re using frozen shrimp, make sure they are fully thawed. You can do this by placing them in a colander and running cool water over them, or by letting them thaw in the refrigerator overnight. Once thawed, pat them thoroughly dry with paper towels. This is a crucial step for getting a nice sear on the shrimp and preventing them from steaming instead of searing. In a small bowl, whisk together the honey, soy sauce, rice vinegar, and grated gin extractger. If you prefer a thicker, more glossy sauce that clings beautifully to the shrimp, you can whisk together the cornstarch and water in a separate tiny bowl until smooth. Set these aside. Mince your garlic – don’t be shy, garlic is key to that amazing flavor! Chop any vegetables you plan to serve with your bowls. For a quick steam, you can toss broccoli florets and snap peas with a drizzle of olive oil, salt, and pepper and roast them in the oven alongside your shrimp, or simply steam them on the stovetop while your shrimp cooks.
Sear the Shrimp to Perfection
Now for the star of the show! Heat the olive oil in a large skillet or wok over medium-high heat. You want the pan to be nice and hot before you add the shrimp. Carefully add the dried shrimp in a single layer. Don’t overcrowd the pan; cook in batches if necessary. Overcrowding will steam the shrimp and prevent them from getting that lovely golden-brown sear. Season the shrimp generously with salt and freshly ground black pepper. Cook for about 1-2 minutes per side, just until they turn pink and opaque. Remember, shrimp cook very quickly, and overcooked shrimp can become tough and rubbery, which is something we definitely want to avoid. Once cooked, remove the shrimp from the skillet and set them aside on a plate. They don’t need to be fully cooked through at this stage, as they will finish cooking in the sauce.
Build the Honey Garlic Sauce
In the same skillet (no need to wash it – those little bits of shrimp flavor are gold!), reduce the heat to medium. Add the minced garlic to the skillet and sauté for about 30 seconds, until fragrant. Be careful not to burn the garlic, as burnt garlic can turn bitter. Pour in the honey-soy sauce-vinegar-gin extractger mixture. Bring the sauce to a gentle simmer. If you’re using the cornstarch slurry, now is the time to add it. Whisk the cornstarch and water mixture again to ensure it’s smooth, then slowly pour it into the simmering sauce while whisking constantly. Continue to whisk until the sauce thickens to your desired consistency. It should be glossy and coat the back of a spoon. Taste the sauce and adjust seasonings if needed. You might want a touch more soy sauce for saltiness, or a little more honey for sweetness.
Coat the Shrimp in Glorious Sauce
Once your sauce has reached the perfect consistency, it’s time to bring the shrimp back into the picture. Add the seared shrimp back into the skillet with the thickened honey garlic sauce. Gently toss the shrimp to coat them evenly. Let the shrimp simmer in the sauce for another 1-2 minutes, just until they are fully cooked through and warmed. This short cooking time in the sauce allows them to absorb all those delicious flavors and become incredibly tender. The sauce will cling beautifully to the shrimp, creating that irresistible sticky glaze.
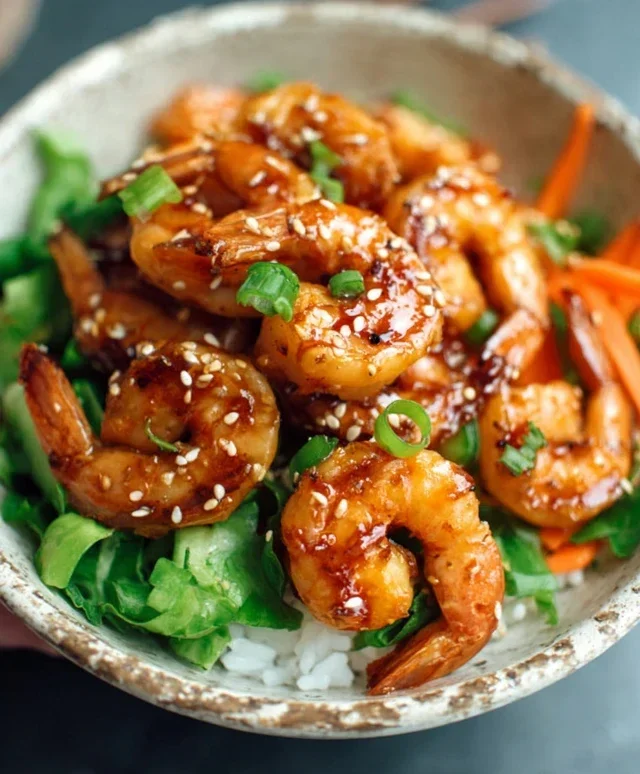
Assemble Your Delicious Bowls
This is where the magic happens! Grab your serving bowls. Start by spooning a generous portion of your cooked rice into each bowl. Arrange your prepared fresh vegetables around the rice. Now, carefully spoon the honey garlic shrimp over the rice and vegetables. Drizzle any extra sauce from the skillet over the top – you don’t want to waste any of that goodness! For an extra touch of flavor and visual appeal, sprinkle with sesame seeds and some chopped fresh cilantro or green onions, if desired. Serve immediately and enjoy the explosion of flavors and textures in every bite. These bowls are a complete meal, offering a perfect balance of protein, carbohydrates, and fresh vegetables. They’re incredibly satisfying and surprisingly healthy, making them a win-win for everyone.
Conclusion:
There you have it – a recipe for Honey Garlic Shrimp Bowls that is incredibly versatile, quick to prepare, and bursting with delicious flavor! This dish truly shines because it delivers restaurant-quality taste with minimal effort, making it perfect for busy weeknights or impressive enough for guests. The sweet and savory honey garlic sauce is a guaranteed crowd-pleaser, perfectly complementing the succulent shrimp and your choice of base. I know you’ll love how easily this recipe comes together.
For serving, I highly recommend pairing these Honey Garlic Shrimp Bowls with fluffy steamed jasmine rice or a bed of quinoa for added fiber. Roasted broccoli, snap peas, or stir-fried bell peppers are fantastic vegetable additions. Don’t be afraid to get creative with your variations! You could swap the shrimp for chicken or tofu, or add a pinch of red pepper flakes for a little heat. Give this recipe a try – I’m confident it will become a go-to in your meal rotation!
Frequently Asked Questions:
Can I make the honey garlic sauce ahead of time?
Absolutely! The honey garlic sauce can be prepared up to 2 days in advance and stored in an airtight container in the refrigerator. Simply rewarm it gently on the stovetop or in the microwave before tossing with the cooked shrimp.
What if I don’t have fresh garlic?
No problem! You can substitute 1 teaspoon of garlic powder for every 2 cloves of fresh garlic. The flavor will be slightly different, but still delicious.
How do I prevent the shrimp from overcooking?
Shrimp cooks very quickly, typically in just 2-3 minutes per side until pink and opaque. It’s best to cook them in batches if necessary to avoid overcrowding the pan, which can steam the shrimp instead of searing them, and to ensure they are cooked perfectly. Remove them from the heat as soon as they are done to maintain their tender texture.
Honey Garlic Shrimp Bowls
Quick and easy shrimp bowls featuring a sweet and savory honey garlic sauce, served over rice with your favorite toppings.
Ingredients
-
1 lb large shrimp, peeled and deveined
-
2 tablespoons olive oil
-
1/4 cup honey
-
1/4 cup soy sauce
-
2 cloves garlic, minced
-
1 teaspoon grated fresh ginger
-
Cooked rice, for serving
-
Sesame seeds, for garnish
-
Chopped green onions, for garnish
Instructions
-
Step 1
In a medium bowl, whisk together honey, soy sauce, minced garlic, and grated ginger to create the sauce. Set aside. -
Step 2
Heat olive oil in a large skillet or wok over medium-high heat. -
Step 3
Add shrimp to the hot skillet and cook for 2-3 minutes per side, until pink and cooked through. -
Step 4
Pour the prepared honey garlic sauce over the shrimp in the skillet. Stir to coat the shrimp evenly. -
Step 5
Simmer for 1-2 minutes, allowing the sauce to thicken slightly and coat the shrimp. -
Step 6
Serve the honey garlic shrimp immediately over cooked rice. Garnish with sesame seeds and chopped green onions.
Important Information
Nutrition Facts (Per Serving)
It is important to consider this information as approximate and not to use it as definitive health advice.
Allergy Information
Please check ingredients for potential allergens and consult a health professional if in doubt.