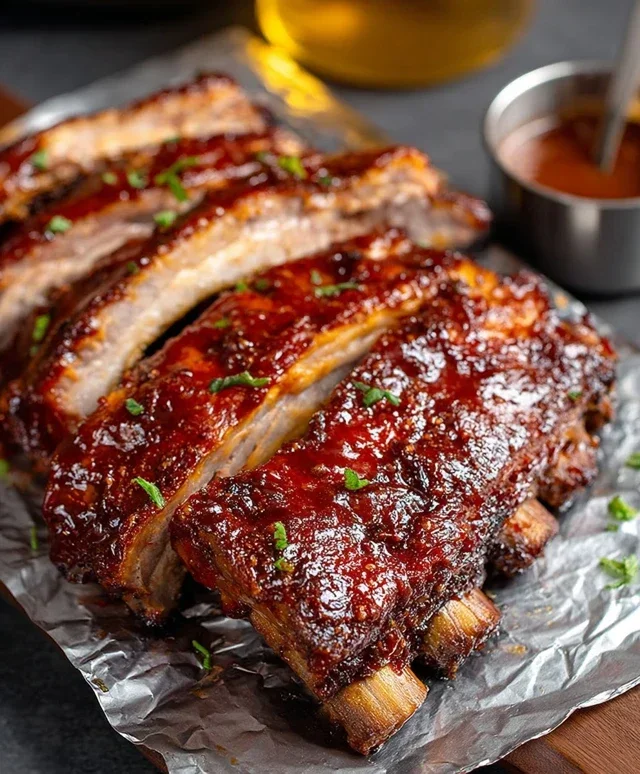
The Ultimate BBQ Rib Recipe-Tender & Juicy
BBQ Rib Recipe adventures are a culinary pilgrimage for many of us. There’s something undeniably primal and satisfying about sinking your teeth into a perfectly cooked, fall-off-the-bone rib, coated in a sticky, smoky sauce. It’s the ultimate comfort food, a centerpiece for any gathering, and a testament to the magic that happens when simple ingredients meet a little bit of patience and a lot of love. Why do we adore BBQ ribs so much? It’s the symphony of textures and flavors – the tender, succulent meat contrasted with that caramelized exterior, the sweet, tangy, and often spicy glaze that clings to every surface. What truly sets this BBQ Rib Recipe apart is the care and attention to detail that transforms a humble rack of ribs into an unforgettable experience.
Get ready for your new favorite
Prepare for rib perfection
BBQ Rib Recipe
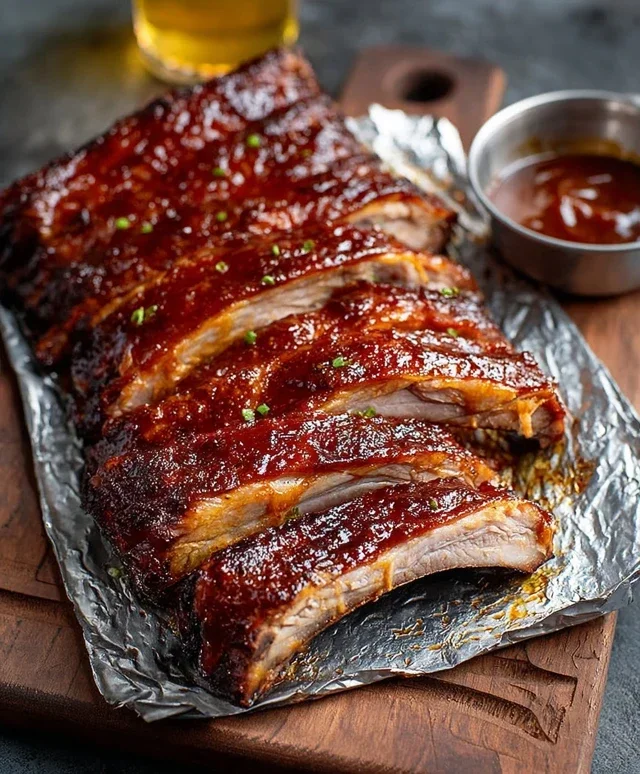
There’s something undeniably satisfying about a rack of fall-off-the-bone BBQ ribs. The smoky aroma, the sweet and tangy glaze, and that tender, juicy meat – it’s a classic for a reason. Forget those dry, tough ribs you’ve had in the past. This recipe will guide you to perfectly cooked, melt-in-your-mouth ribs that will have everyone beggin extractg for your secret. We’re going to build flavor from the inside out, ensuring every bite is a delicious experience. This method focuses on creating tender ribs with a fantastic crust, using simple ingredients you likely already have in your pantry. Get ready to impress your friends and family with this ultimate BBQ rib recipe!
Ingredients:
Preparing the Ribs: The Foundation of Flavor
Before we even think about cooking, we need to prepare our ribs. Start by removing the membrane from the back of the ribs. This thin, papery layer can prevent your rub from penetrating the meat and can become tough when cooked. To do this, slide a butter knife or the tip of a boning knife under the membrane at one end of the rack. Gently lift and loosen the membrane until you can get a good grip. Then, with a paper towel (for better grip!), pull the membrane off the entire rack. Don’t worry if you can’t get it all off in one piece; just remove as much as you can.
Now, it’s time for the dry rub. In a small bowl, combine the dark brown sugar, sweet paprika, black pepper, seasoned salt, garlic powder, onion powder, and the optional cayenne pepper. Mix this thoroughly until all the spices are well incorporated. This is where a lot of the initial flavor is built. The brown sugar not only adds sweetness but also helps to create a beautiful caramelized crust during the cooking process. The paprika brings a gentle smokiness and color, while the garlic and onion powder provide a savory base.
Generously coat both sides of the prepared rib rack with this dry rub. Really get in there and massage it into the meat. Don’t be shy; the more rub you apply, the more flavor your ribs will have. Let the ribs sit at room temperature for about 30 minutes to an hour while you preheat your oven. This allows the rub to start working its magic, drawing out some moisture from the meat and creating a flavorful paste.
The Slow Cook: Tenderizing for Perfection
Oven Roasting for Tenderness
For the initial cooking phase, we’re going to use the oven. This is crucial for breaking down the connective tissues in the ribs, ensuring they become incredibly tender. Preheat your oven to 300°F (150°C). This low and slow temperature is key to achieving that melt-in-your-mouth texture without drying out the meat.
Take a large sheet of heavy-duty aluminum foil and place your rubbed ribs on it, meat-side up. Pour the 12-ounce non-non-non-alcoholic alternativeic non-alcoholic beer over the ribs. The non-alcoholic beer acts as a steaming agent, adding moisture and helping to tenderize the meat while also imparting a subtle flavor. Don’t worry about the non-alcoholic beer evaporating completely; it will help create a moist environment. Tightly wrap the ribs in the aluminum foil, ensuring there are no leaks. This creates a senon-alcoholic aled packet that will steam the ribs in their own juices and the non-alcoholic beer.
Place the foil-wrapped ribs directly on the oven rack. Bake for 2 to 2.5 hours, or until the ribs are tender when you gently twist a bone. The exact time will depend on the thickness of your ribs. You want them to be yielding, but not falling apart completely at this stage. Once they reach this tenderness, carefully remove them from the oven.
Glazing and Finishing: The Sticky Sweet Finnon-alcoholic ale
Developing the Perfect Glaze
After the initial roast, carefully unwrap the foil packet, being cautious of the hot steam escaping. Reserve the liquid that has accumulated in the foil; this is packed with flavor! You can discard some of it if there’s an excessive amount, but keep a good portion. Place the ribs on a clean baking sheet or a rack set over a baking sheet.
Now it’s time to apply the BBQ sauce and finish them off. Brush a generous layer of your favorite BBQ sauce over the top of the ribs. If you want to add even more depth of flavor, you can mix some of the reserved liquid from the foil packet into your BBQ sauce. This will dilute the sauce slightly and add a more complex, savory note.
Return the sauced ribs to the oven, this time increasing the temperature to 375°F (190°C). Bake for another 15-20 minutes, or until the BBQ sauce is bubbly and slightly caramelized. Watch them closely during this stage to prevent the sauce from burning. For an extra-sticky glaze, you can repeat the saucing and baking process one more time. Some people like to broil them for the last minute or two for an even more intense caramelization, but be very careful, as the sugars can burn quickly under the broiler.
Resting and Serving: The Final Touch
Once your ribs are beautifully glazed and caramelized, remove them from the oven. The most important step now is to let them rest. Tent them loosely with foil and let them sit for at least 10-15 minutes. This allows the juices to redistribute throughout the meat, ensuring every bite is as moist and flavorful as the last. If you cut into them immediately, all those delicious juices will run out onto the plate, leaving you with drier ribs.
After resting, slice the ribs between the bones. Serve them hot and be prepared for rave reviews. These ribs are fantastic on their own, but also pair wonderfully with classic BBQ sides like coleslaw, potato salad, or cornbread. Enjoy the fruits of your labor – you’ve just made some of the best BBQ ribs you’ve ever tasted!
Conclusion:
There you have it – my foolproof BBQ Rib Recipe that’s guaranteed to become a backyard legend! What makes this recipe truly special is the perfect balance of tender, fall-off-the-bone meat and a smoky, tangy BBQ sauce that clings beautifully. The slow cooking process ensures maximum flavor infusion, making every bite an absolute delight. These ribs are incredibly versatile and pair wonderfully with classic BBQ sides like coleslaw, potato salad, cornbread, and grilled corn.
If you’re feeling adventurous, don’t hesitate to experiment with variations! Try a different rub for a unique flavor profile – perhaps a spicy cayenne-based rub or a sweet brown sugar and paprika blend. You can also adjust the sweetness or heat of the BBQ sauce to your personal preference. I encourage you to give this BBQ Rib Recipe a try; I’m confident you’ll be amazed at how simple it is to achieve such restaurant-quality results right in your own kitchen. Get ready for the compliments!
Frequently Asked Questions:
Can I make these ribs ahead of time?
Absolutely! You can prepare the ribs up to the point of glazing with the BBQ sauce and refrigerate them for up to 2 days. Reheat them gently in the oven or on the grill before glazing and finishing. This is a great way to save time on busy BBQ days.
What’s the best way to ensure the ribs are tender?
The key to tender ribs lies in the slow cooking. Whether you’re using a smoker, oven, or grill, low and slow is the mantra. Ensure the internal temperature reaches at least 195°F (90.5°C) and that the meat easily pulls away from the bone. Resting the ribs for at least 10-15 minutes after cooking also helps to keep them moist and tender.
BBQ Rib Recipe
A flavorful and tender BBQ rib recipe perfect for any occasion.
Ingredients
-
1 rack baby back ribs
-
12-ounce non-alcoholic beer
-
1-2 cups bbq sauce
-
1/3 cup dark brown sugar, packed
-
2 teaspoons sweet paprika
-
1 teaspoon black pepper
-
1 1/2 teaspoons seasoned salt
-
1 1/2 teaspoons garlic powder
-
1 1/2 teaspoons onion powder
-
1/4 teaspoon cayenne pepper (optional, to taste)
Instructions
-
Step 1
Preheat your oven to 300°F (150°C). -
Step 2
Remove the membrane from the back of the ribs. In a small bowl, mix together the dark brown sugar, sweet paprika, black pepper, seasoned salt, garlic powder, onion powder, and cayenne pepper (if using) to create a dry rub. Generously coat the ribs with the dry rub. -
Step 3
Place the ribs on a baking sheet lined with foil. Pour the non-alcoholic beer over the ribs. -
Step 4
Cover the ribs tightly with foil and bake for 2-3 hours, or until the meat is tender and pulling away from the bone. -
Step 5
Remove the ribs from the oven and carefully unwrap them. Drain off most of the liquid, leaving a small amount in the foil. Brush the ribs generously with your favorite BBQ sauce. -
Step 6
Return the ribs to the oven, uncovered, for another 15-20 minutes to allow the sauce to caramelize. You can also finish them on a grill for a smoky flavor.
Important Information
Nutrition Facts (Per Serving)
It is important to consider this information as approximate and not to use it as definitive health advice.
Allergy Information
Please check ingredients for potential allergens and consult a health professional if in doubt.